This guide offers tips and techniques for testing Angular applications. Though this page includes some general testing principles and techniques, the focus is on testing applications written with Angular.
本章提供了一些测试Angular应用的提示和技巧。虽然这里讲述了一些常规测试理念和技巧,但是其重点是测试用Angular编写的应用。
Contents
目录
It’s a big agenda. Fortunately, you can learn a little bit at a time and put each lesson to use.
以上主题繁多。幸运的是,你可以慢慢地阅读并立刻应用每一个主题。
Live examples
在线例子
This guide presents tests of a sample application that is much like the Tour of Heroes tutorial. The sample application and all tests in this guide are available as live examples for inspection, experiment, and download:
这篇指南会展示一个范例应用的所有测试,这个范例应用和《英雄指南》教程非常像。 本章中的这个范例应用及其所有测试都有在线例子,以供查看、试验和下载。
A spec to verify the test environment .用于验证测试环境的规约 。The first component spec with inline template .第一个带内联模板的组件规约 。A component spec with external template .带外部模板的组件规约 。The QuickStart seed's AppComponent spec .快速起步种子工程的 。AppComponent规约The sample application to be tested .所要测试的范例应用 。All specs that test the sample application .本范例应用的所有规约 。A grab bag of additional specs .其它规约汇总 。
Introduction to Angular Testing
Angular测试入门
This page guides you through writing tests to explore and confirm the behavior of the application. Testing does the following:
本章教你如何编写测试程序来探索和确认应用的行为。测试的作用有:
Guards against changes that break existing code (“regressions”).
测试守护由于代码变化而打破已有代码(“回归”)的情况。
Clarifies what the code does both when used as intended and when faced with deviant conditions.
不管代码被正确使用还是错误使用,测试程序起到澄清代码的作用。
Reveals mistakes in design and implementation. Tests shine a harsh light on the code from many angles. When a part of the application seems hard to test, the root cause is often a design flaw, something to cure now rather than later when it becomes expensive to fix.
测试程序暴露设计和实现可能出现的错误。测试程序从很多角度为代码亮出警报灯。当应用程序很难被测试时, 其根本原因一般都是设计缺陷,这种缺陷最好立刻被修正,不要等到它变得很难被修复的时候才行动。
This chapter assumes that you know something about testing. Don't worry if you don't. There are plenty of books and online resources to get up to speed.
本章假设你熟悉测试。但是如果你不熟悉也没有关系。有很多书本和在线资源可以帮助你。
Tools and technologies
工具与技术
You can write and run Angular tests with a variety of tools and technologies. This guide describes specific choices that are known to work well.
你可以用多种工具和技术来编写和运行Angular测试程序。本章介绍了一些大家已经知道能良好工作的选择。
Technology 技术 | Purpose 目的 |
|---|---|
| Jasmine | The Jasmine test framework provides everything needed to write basic tests. It ships with an HTML test runner that executes tests in the browser. Jasmine测试框架提供了所有编写基本测试的工具。 它自带HTML测试运行器,用来在浏览器中执行测试程序。 |
Angular testing utilities Angular测试工具 | Angular testing utilities create a test environment for the Angular application code under test. Use them to condition and control parts of the application as they interact within the Angular environment. Angular测试工具为被测试的Angular应用代码创建测试环境。在应用代码与Angular环境互动时,使用Angular测试工具来限制和控制应用的部分代码。 |
| Karma | The karma test runner is ideal for writing and running unit tests while developing the application. It can be an integral part of the project's development and continuous integration processes. This guide describes how to set up and run tests with karma. karma测试运行器是在开发应用的过程中 编写和运行单元测试的理想工具。 它能成为项目开发和连续一体化进程的不可分割的一部分。本章讲述了如何用Karma设置和运行测试程序。 |
| Protractor | Use protractor to write and run end-to-end (e2e) tests. End-to-end tests explore the application as users experience it. In e2e testing, one process runs the real application and a second process runs protractor tests that simulate user behavior and assert that the application respond in the browser as expected. 使用 |
Setup
环境设置
There are two fast paths to getting started with unit testing.
要开始单元测试,有两条捷径:
Start a new project following the instructions in Setup.
遵循环境设置中给出的步骤开始一个新项目。
Start a new project with the Angular CLI.
使用Angular CLI创建新的项目。
Both approaches install npm packages, files, and scripts pre-configured for applications built in their respective modalities. Their artifacts and procedures differ slightly but their essentials are the same and there are no differences in the test code.
以上两种方法都安装在各自的模式下为应用预先配置的npm包、文件和脚本。它们的文件和规程有一点不同,但是它们的核心部分是一样的,并且在测试代码方面没有任何区别。
In this guide, the application and its tests are based on the setup instructions. For a discussion of the unit testing setup files, see below.
本章中,该应用及其测试都是基于环境设置步骤的。 对单元测试的环境设置文件的讨论,参见后面。
Isolated unit tests vs. the Angular testing utilites
独立单元测试 vs. Angular测试工具集
Isolated unit tests
examine an instance of a class all by itself without any dependence on Angular or any injected values.
The tester creates a test instance of the class with new, supplying test doubles for the constructor parameters as needed, and
then probes the test instance API surface.
独立单元测试用于测试那些完全不依赖Angular或不需要注入值的类实例。
测试程序是所有new创建该类的实例,为构造函数参数提供所需的测试替身,然后测试该实例的API接口。
You should write isolated unit tests for pipes and services.
我们应该为管道和服务书写独立单元测试。
You can test components in isolation as well. However, isolated unit tests don't reveal how components interact with Angular. In particular, they can't reveal how a component class interacts with its own template or with other components.
我们也同样可以对组件写独立单元测试。 不过,独立单元测试无法体现组件与Angular的交互。 具体来说,就是不能发现组件类如何与它的模板或其它组件交互。
Such tests require the Angular testing utilities.
The Angular testing utilities include the TestBed class and several helper functions from @angular/core/testing.
They are the main focus of this guide and you'll learn about them
when you write your first component test.
A comprehensive review of the Angular testing utilities appears later in this guide.
这时你需要Angular测试工具集。
Angular测试工具集包括TestBed类和一些来自@angular/core/testing的助手函数。
本章将会重点讲解它们,通过第一个组件测试来讲解。
本章稍后的部分将展示Angular测试工具集的全貌。
But first you should write a dummy test to verify that your test environment is set up properly and to lock in a few basic testing skills.
但首先,我们要先随便写一个测试来验证测试环境是否已经就绪了,并掌握一些基础的测试技术。
Back to top回到顶部The first karma test
第一个karma测试
Start with a simple test to make sure that the setup works properly.
编写简单的测试程序,来确认以上的配置是否工作正常。
Create a new file called 1st.spec.ts in the application root folder, src/app/
在应用的根目录app/创建新文件,名叫1st.spec.ts。
Tests written in Jasmine are called specs .
The filename extension must be .spec.ts,
the convention adhered to by karma.conf.js and other tooling.
用Jasmine编写的测试程序都被叫做specs。文件名后缀必须是.spec.ts,这是karma.conf.js和其它工具所坚持和遵守的规约。
Put spec files somewhere within the src/app/ folder.
The karma.conf.js tells karma to look for spec files there,
for reasons explained below.
将测试程序spec放到app/文件夹下的任何位置。
karma.conf.js告诉Karma在这个文件夹中寻找测试程序spec文件,原因在 这里 有所解释。
Add the following code to src/app/1st.spec.ts.
添加下面的代码到app/1st.spec.ts。
src/app/1st.spec.ts
Run with karma
运行Karma
Compile and run it in karma from the command line using the following command:
使用下面的命令从命令行中编译并在Karma中运行上面的测试程序。
The command compiles the application and test code and starts karma. Both processes watch pertinent files, write messages to the console, and re-run when they detect changes.
该命令编译应用及其测试代码,并启动Karma。 两个进程都监视相关文件,往控制台输入信息和检测到变化时自动重新运行。
The documentation setup defines the test command in the scripts section of npm's package.json.
The Angular CLI has different commands to do the same thing. Adjust accordingly.
《快速起步》在npm的package.json中的scripts里定义了test命令。
Angular CLI使用不同的命令来做同样的事情。对不同的环境采取不同的方案。
After a few moments, karma opens a browser and starts writing to the console.
等一小段时间后,Karma便打开浏览器并开始向控制台输出。
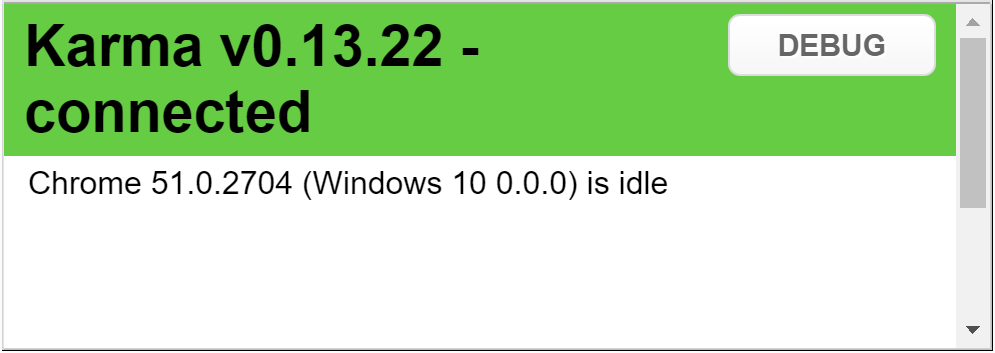
Hide (don't close!) the browser and focus on the console output, which should look something like this:
隐藏(不要关闭)浏览器,查看控制台的输出,应该是这样的:
Both the compiler and karma continue to run. The compiler output is preceded by [0];
the karma output by [1].
编译器和Karma都会持续运行。编译器的输入信息前面有[0],Karma的输出前面有[1]。
Change the expectation from true to false.
将期望从true变换为false。
The compiler watcher detects the change and recompiles.
编译器监视器检测到这个变化并重新编译。
The karma watcher detects the change to the compilation output and re-runs the test.
Karma监视器检测到编译器输出的变化,并重新运行测试。
It fails of course.
正如所料,测试结果是失败。
Restore the expectation from false back to true.
Both processes detect the change, re-run, and karma reports complete success.
将期望从false恢复为true。两个进程都检测到这个变化,自动重新运行,Karma报告测试成功。
The console log can be quite long. Keep your eye on the last line.
When all is well, it reads SUCCESS.
控制台的日志可能会非常长。注意最后一样。当一切正常时,它会显示SUCCESS。
Test debugging
调试测试程序
Debug specs in the browser in the same way thatyou debug an application.
在浏览器中,像调试应用一样调试测试程序spec。
Reveal the karma browser window (hidden earlier).
显示
Karma的浏览器窗口(之前被隐藏了)。Click the DEBUG button; it opens a new browser tab and re-runs the tests.
点击“DEBUG”按钮;它打开一页新浏览器标签并重新开始运行测试程序
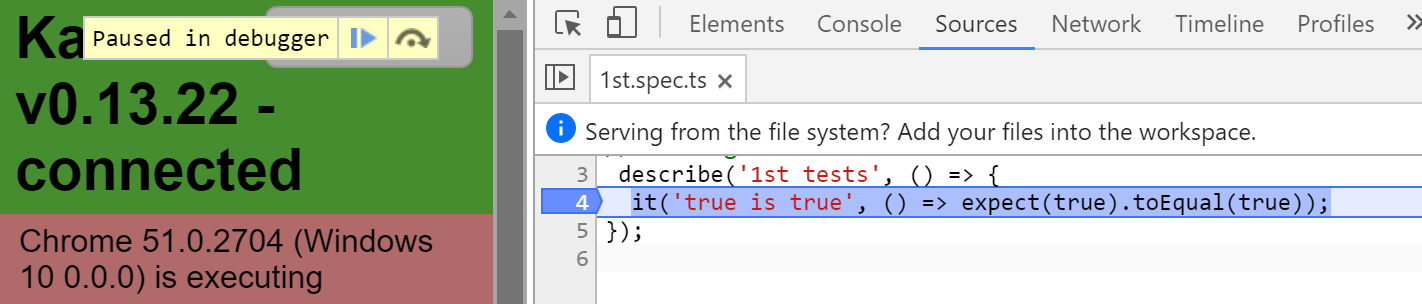
Open the browser's “Developer Tools” (
Ctrl-Shift-Ion windows;Command-Option-Iin OSX).打开浏览器的“Developer Tools”(Windows上的Ctrl-Shift-I或者OSX上的`Command-Option-I)。
Pick the "sources" section.
选择“sources”页
Open the
1st.spec.tstest file (Control/Command-P, then start typing the name of the file).打开
1st.spec.ts测试文件(Control/Command-P, 然后输入文件名字)。Set a breakpoint in the test.
在测试程序中设置断点。
Refresh the browser, and it stops at the breakpoint.
刷新浏览器...然后它就会停在断点上。
Try the live example
试试这个在线例子
You can also try this test as a
你还可以在plunker的
Test a component
测试一个组件
An Angular component is the first thing most developers want to test.
The BannerComponent in src/app/banner-inline.component.ts is the simplest component in this application and
a good place to start.
It presents the application title at the top of the screen within an <h1> tag.
大多数开发人员首先要测试的就是Angular组件。
src/app/banner-inline.component.ts中的BannerComponent是这个应用中最简单的组件,也是一个好的起点。
它所表示的是屏幕顶部<h1>标签中的应用标题。
src/app/banner-inline.component.ts
This version of the BannerComponent has an inline template and an interpolation binding.
The component is probably too simple to be worth testing in real life but
it's perfect for a first encounter with the Angular testing utilities.
这个版本的BannerComponent有一个内联模板和一个插值表达式绑定。
这个组件可能太简单,以至于在真实的项目中都不值得测试,但它却是首次接触Angular测试工具集时的完美例子。
The corresponding src/app/banner-inline.component.spec.ts sits in the same folder as the component,
for reasons explained in the FAQ answer to
"Why put specs next to the things they test?".
组件对应的src/app/banner-inline.component.spec.ts文件与该组件位于同一个目录中,原因详见FAQ中的
为什么要把测试规约文件放在被测试对象旁边?
Start with ES6 import statements to get access to symbols referenced in the spec.
在测试文件中,我们先用ES6的import语句来引入测试所需的符号。
src/app/banner-inline.component.spec.ts (imports)
Here's the describe and the beforeEach that precedes the tests:
测试前面的describe和beforeEach如下:
src/app/banner-inline.component.spec.ts (beforeEach)
TestBed
TestBed is the first and most important of the Angular testing utilities.
It creates an Angular testing module—an @NgModule class—that
you configure with the configureTestingModule method to produce the module environment for the class you want to test.
In effect, you detach the tested component from its own application module
and re-attach it to a dynamically-constructed Angular test module
tailored specifically for this battery of tests.
TestBed(测试台)是Angular测试工具集中的首要概念。
它创建Angular测试模块(一个@NgModule类),我们可以通过调用它的configureTestingModule方法来为要测试的类生成模块环境。
其效果是,你可以把被测试的组件从原有的应用模块中剥离出来,把它附加到一个动态生成的Angular测试模块上,而该测试模块可以为这些测试进行特殊裁剪。
The configureTestingModule method takes an @NgModule-like metadata object.
The metadata object can have most of the properties of a normal Angular module.
configureTestingModule方法接受一个类似@NgModule的元数据对象。这个元数据对象具有标准Angular模块的大多数属性。
This metadata object simply declares the component to test, BannerComponent.
The metadata lack imports because (a) the default testing module configuration already has what BannerComponent needs
and (b) BannerComponent doesn't interact with any other components.
这里的元数据对象只是声明了要测试的组件BannerComponent。
这个元数据中没有imports属性,这是因为:(a) 默认的测试模块配置中已经有了BannerComponent所需的一切,(b) BannerComponent不需要与任何其它组件交互。
Call configureTestingModule within a beforeEach so that
TestBed can reset itself to a base state before each test runs.
在beforeEach中调用configureTestingModule,以便TestBed可以在运行每个测试之前都把自己重置回它的基础状态。
The base state includes a default testing module configuration consisting of the declarables (components, directives, and pipes) and providers (some of them mocked) that almost everyone needs.
基础状态中包含一个默认的测试模块配置,它包含每个测试都需要的那些声明(组件、指令和管道)以及服务提供商(有些是Mock版)。
The testing shims mentioned later initialize the testing module configuration
to something like the BrowserModule from @angular/platform-browser.
之前提到的测试垫片初始化测试模块配置到一个模块,这个模块和@angular/platform-browser中的BrowserModule类似。
This default configuration is merely a foundation for testing an app.
Later you'll call TestBed.configureTestingModule with more metadata that define additional
imports, declarations, providers, and schemas to fit your application tests.
Optional override methods can fine-tune aspects of the configuration.
这个默认的配置只是测试的基础性工作。稍后我们会调用TestBed.configureTestingModule来传入更多元数据,这些元数据定义了额外的
imports、declarations、providers和试用于这些测试的概要(Schema)。
可选的override方法可以微调配置的各个方面。
createComponent
After configuring TestBed, you tell it to create an instance of the component-under-test.
In this example, TestBed.createComponent creates an instance of BannerComponent and
returns a component test fixture.
在配置好TestBed之后,我们可以告诉它创建一个待测组件的实例。
在这个例子中,TestBed.createComponent创建了一个BannerComponent的实例,并返回一个组件测试夹具。
Do not re-configure TestBed after calling createComponent.
在调用了createComponent之后就不要再重新配置TestBed了。
The createComponent method closes the current TestBed instance to further configuration.
You cannot call any more TestBed configuration methods, not configureTestingModule
nor any of the override... methods. If you try, TestBed throws an error.
createComponent方法封闭了当前的TestBed实例,以免将来再配置它。
我们不能再调用任何TestBed的方法修改配置:不能调用configureTestingModule或任何override...方法。如果这么做,TestBed就会抛出错误。
ComponentFixture, DebugElement, and query(By.css)
ComponentFixture、DebugElement 和 query(By.css)
The createComponent method returns a ComponentFixture, a handle on the test environment surrounding the created component.
The fixture provides access to the component instance itself and
to the DebugElement, which is a handle on the component's DOM element.
createComponent方法返回ComponentFixture,用来控制和访问已创建的组件所在的测试环境。
这个fixture提供了对组件实例自身的访问,同时还提供了用来访问组件的DOM元素的DebugElement对象。
The title property value is interpolated into the DOM within <h1> tags.
Use the fixture's DebugElement to query for the <h1> element by CSS selector.
title属性被插值到DOM的<h1>标签中。
用CSS选择器从fixture的DebugElement中query``<h1>元素。
The query method takes a predicate function and searches the fixture's entire DOM tree for the
first element that satisfies the predicate.
The result is a different DebugElement, one associated with the matching DOM element.
query方法接受predicate函数,并搜索fixture的整个DOM树,试图寻找第一个满足predicate函数的元素。
The queryAll method returns an array of all DebugElements that satisfy the predicate.
queryAll方法返回一列数组,包含所有DebugElement中满足predicate的元素。
A predicate is a function that returns a boolean.
A query predicate receives a DebugElement and returns true if the element meets the selection criteria.
predicate是返回布尔值的函数。
predicate查询接受DebugElement参数,如果元素符合选择条件便返回true。
The By class is an Angular testing utility that produces useful predicates.
Its By.css static method produces a
standard CSS selector
predicate that filters the same way as a jQuery selector.
By类是Angular测试工具之一,它生成有用的predicate。
它的By.css静态方法产生标准CSS选择器
predicate,与JQuery选择器相同的方式过滤。
Finally, the setup assigns the DOM element from the DebugElement nativeElement property to el.
The tests assert that el contains the expected title text.
最后,这个配置把DebugElement中的nativeElementDOM元素赋值给el属性。
测试程序将判断el是否包含期待的标题文本。
The tests
测试程序
Jasmine runs the beforeEach function before each of these tests
再每个测试程序之前,Jasmin都一次运行beforeEach函数:
src/app/banner-inline.component.spec.ts (tests)
These tests ask the DebugElement for the native HTML element to satisfy their expectations.
这些测试程序向DebugElement获取原生HTML元素,来满足自己的期望。
detectChanges: Angular change detection within a test
detectChanges:在测试中的Angular变更检测
Each test tells Angular when to perform change detection by calling fixture.detectChanges().
The first test does so immediately, triggering data binding and propagation of the title property
to the DOM element.
每个测试程序都通过调用fixture.detectChanges()来通知Angular执行变更检测。第一个测试程序立刻这么做,触发数据绑定和并将title属性发送到DOM元素中。
The second test changes the component's title property and only then calls fixture.detectChanges();
the new value appears in the DOM element.
第二个测试程序在更改组件的title属性之后才调用fixture.detectChanges()。新值出现在DOM元素中。
In production, change detection kicks in automatically when Angular creates a component or the user enters a keystroke or an asynchronous activity (e.g., AJAX) completes.
在产品阶段,当Angular创建组件、用户输入或者异步动作(比如AJAX)完成时,自动触发变更检测。
The TestBed.createComponent does not trigger change detection.
The fixture does not automatically push the component's title property value into the data bound element,
a fact demonstrated in the following test:
TestBed.createComponent不会触发变更检测。该工具不会自动将组件的title属性值推送到数据绑定的元素,下面的测试程序展示了这个事实:
src/app/banner-inline.component.spec.ts (no detectChanges)
This behavior (or lack of it) is intentional. It gives the tester an opportunity to inspect or change the state of the component before Angular initiates data binding or calls lifecycle hooks.
这种行为(或者缺乏的行为)是有意为之。在Angular初始化数据绑定或者调用生命周期钩子之前,它给测试者机会来查看或者改变组件的状态。
Try the live example
试试在线例子
Take a moment to explore this component spec as a
花点时间来浏览一下该组件的规约,比如
Automatic change detection
自动变更检测
The BannerComponent tests frequently call detectChanges.
Some testers prefer that the Angular test environment run change detection automatically.
That's possible by configuring the TestBed with the ComponentFixtureAutoDetect provider .
First import it from the testing utility library :
BannerComponent的测试频繁调用detectChanges。
有些测试人员更希望Angular的测试环境自动进行变更检测。
这可以通过为TestBed配置上ComponentFixtureAutoDetect提供商来做到。首先从测试工具库中导入它:
src/app/banner.component.detect-changes.spec.ts (import)
Then add it to the providers array of the testing module configuration:
然后把它添加到测试模块配置的providers数组中:
src/app/banner.component.detect-changes.spec.ts (AutoDetect)
Here are three tests that illustrate how automatic change detection works.
下列测试阐明了自动变更检测的工作原理。
src/app/banner.component.detect-changes.spec.ts (AutoDetect Tests)
The first test shows the benefit of automatic change detection.
第一个测试程序展示了自动检测的好处。
The second and third test reveal an important limitation.
The Angular testing environment does not know that the test changed the component's title.
The ComponentFixtureAutoDetect service responds to asynchronous activities such as promise resolution, timers, and DOM events.
But a direct, synchronous update of the component property is invisible.
The test must call fixture.detectChanges() manually to trigger another cycle of change detection.
第二和第三个测试程序显示了一个重要的局限性。
Angular测试环境不会知道测试程序改变了组件的title属性。
自动检测只对异步行为比如承诺的解析、计时器和DOM时间作出反应。
但是直接修改组件属性值的这种同步更新是不会触发自动检测的。
测试程序必须手动调用fixture.detectChange(),来触发新一轮的变更检测周期。
Rather than wonder when the test fixture will or won't perform change detection,
the samples in this guide always call detectChanges() explicitly.
There is no harm in calling detectChanges() more often than is strictly necessary.
与其怀疑测试工具会不会执行变更检测,本章中的例子总是显式调用detectChanges()。
即使是在不需要的时候,频繁调用detectChanges()没有任何什么坏处。
Test a component with an external template
测试带有外部模板的组件
The application's actual BannerComponent behaves the same as the version above but is implemented differently.
It has external template and css files, specified in templateUrl and styleUrls properties.
在实际应用中,BannerComponent的行为和刚才的版本相同,但是实现方式不同。
它有一个外部模板和CSS文件,通过templateUrl和styleUrls属性来指定。
src/app/banner.component.ts
That's a problem for the tests.
The TestBed.createComponent method is synchronous.
But the Angular template compiler must read the external files from the file system before it can create a component instance.
That's an asynchronous activity.
The previous setup for testing the inline component won't work for a component with an external template.
这些测试有一个问题。
TestBed.createComponent方法是同步的。
但是Angular模板编译器必须在创建组件实例之前先从文件系统中读取这些值,而这是异步的。
以前测试内联模板时使用的设置方式不适用于外部模板。
The first asynchronous beforeEach
第一个异步的beforeEach
The test setup for BannerComponent must give the Angular template compiler time to read the files.
The logic in the beforeEach of the previous spec is split into two beforeEach calls.
The first beforeEach handles asynchronous compilation.
BannerComponent测试的设置方式必须给Angular模板编译器一些时间来读取文件。
以前放在beforeEach中的逻辑被拆分成了两个beforeEach调用。
第一个beforeEach处理异步编译工作。
src/app/banner.component.spec.ts (first beforeEach)
Notice the async function called as the argument to beforeEach.
The async function is one of the Angular testing utilities and
has to be imported.
注意async函数被用作调用beforeEach的参数。
async函数是Angular测试工具集的一部分,这里必须引入它。
It takes a parameterless function and returns a function
which becomes the true argument to the beforeEach.
它接收一个无参数的函数,并返回一个函数,这个函数会作为实参传给beforeEach。
The body of the async argument looks much like the body of a synchronous beforeEach.
There is nothing obviously asynchronous about it.
For example, it doesn't return a promise and
there is no done function to call as there would be in standard Jasmine asynchronous tests.
Internally, async arranges for the body of the beforeEach to run in a special async test zone
that hides the mechanics of asynchronous execution.
async参数的内容看起来非常像同步版beforeEach的函数体。
它并不能很明显的看出来这是异步函数。
比如它不返回承诺(Promise),并且也没有标准Jasmine异步测试时常用的done函数作为参数。
内部实现上,async会把beforeEach的函数体放进一个特殊的异步测试区(async test zone),它隐藏了异步执行的内部机制。
All this is necessary in order to call the asynchronous TestBed.compileComponents method.
这就是为了调用异步的TestBed.compileComponents方法所要做的一切。
compileComponents
The TestBed.configureTestingModule method returns the TestBed class so you can chain
calls to other TestBed static methods such as compileComponents.
TestBed.configureTestingModule方法返回TestBed类,以便你可以链式调用TestBed的其它静态方法,比如compileComponents。
The TestBed.compileComponents method asynchronously compiles all the components configured in the testing module.
In this example, the BannerComponent is the only component to compile.
When compileComponents completes, the external templates and css files have been "inlined"
and TestBed.createComponent can create new instances of BannerComponent synchronously.
TestBed.compileComponents方法会异步编译这个测试模块中配置的所有组件。
在这个例子中,BannerComponent是唯一要编译的组件。
当compileComponents完成时,外部组件和css文件会被“内联”,而TestBed.createComponent会用同步的方式创建一个BannerComponent的新实例。
WebPack developers need not call compileComponents because it inlines templates and css
as part of the automated build process that precedes running the test.
WebPack用户不用调用compileComponents,因为它会在构建过程中自动内联模板和css,然后执行测试
In this example, TestBed.compileComponents only compiles the BannerComponent.
Tests later in the guide declare multiple components and
a few specs import entire application modules that hold yet more components.
Any of these components might have external templates and css files.
TestBed.compileComponents compiles all of the declared components asynchronously at one time.
在这个例子中,TestBed.compileComponents只会编译BannerComponent。
本章稍后的测试中会声明多个组件,并且少量规约中会导入包含多个组件的应用模块。所有这些组件都可能含有外部模板和css文件。
TestBed.compileComponents会同时异步编译所有这些声明的组件。
Do not configure the TestBed after calling compileComponents.
Make compileComponents the last step
before calling TestBed.createComponent to instantiate the component-under-test.
调用了compileComponents之后就不能再配置TestBed了。
务必确保compileComponents是调用TestBed.createComponent来实例化待测组件之前的最后一步。
Calling compileComponents closes the current TestBed instance is further configuration.
You cannot call any more TestBed configuration methods, not configureTestingModule
nor any of the override... methods. The TestBed throws an error if you try.
compileComponents方法封闭了当前的TestBed实例,以免将来再配置它。
我们不能再调用任何TestBed的方法修改配置:不能调用configureTestingModule或任何override...方法。如果这么做,TestBed就会抛出错误。
The second synchronous beforeEach
第二个同步beforeEach
A synchronous beforeEach containing the remaining setup steps follows the asynchronous beforeEach.
这个同步的beforeEach包含异步beforeEach之后的其余步骤。
src/app/banner.component.spec.ts (second beforeEach)
These are the same steps as in the original beforeEach.
They include creating an instance of the BannerComponent and querying for the elements to inspect.
这些步骤和原来的beforeEach中相同。
包括创建BannerComponent实例和查询要审查的元素。
You can count on the test runner to wait for the first asynchronous beforeEach to finish before calling the second.
测试运行器(runner)会先等待第一个异步beforeEach函数执行完再调用第二个。
Waiting for compileComponents
等待compileComponents
The compileComponents method returns a promise so you can perform additional tasks immediately after it finishes.
For example, you could move the synchronous code in the second beforeEach
into a compileComponents().then(...) callback and write only one beforeEach.
compileComponents方法返回一个承诺,来让我们可以在它完成之后立即执行额外的任务。
比如,我们可以把第二个beforeEach中的同步代码移到一个compileComponents().then(...)回调中,从而只需要写一个beforeEach。
Most developers find that hard to read.
The two beforeEach calls are widely preferred.
大多数开发人员会觉得这样不易读,因此,更多采用的还是写两个beforeEach调用的方式。
Try the live example
试试在线例子
Take a moment to explore this component spec as a
稍微花点时间,在
The Quickstart seed provides a similar test of its AppComponent
as you can see in this compileComponents although it doesn't have to because the AppComponent's template is inline.
“快速起步” 种子工程为其AppComponent提供了简单的测试,在compileComponents,不过它并不是必须这么做,因为AppComponent的模板是内联的。
There's no harm in it and you might call compileComponents anyway
in case you decide later to re-factor the template into a separate file.
The tests in this guide only call compileComponents when necessary.
这样做也没坏处,如果你将来可能会把模板重构到独立的文件中去,那就可以调用compileComponents。
不过本章中的这些测试只会在必要时才调用compileComponents。
Test a component with a dependency
测试有依赖的组件
Components often have service dependencies.
组件经常依赖其他服务。
The WelcomeComponent displays a welcome message to the logged in user.
It knows who the user is based on a property of the injected UserService:
WelcomeComponent为登陆的用户显示一条欢迎信息。它从注入的UserService的属性得知用户的身份:
src/app/welcome.component.ts
The WelcomeComponent has decision logic that interacts with the service, logic that makes this component worth testing.
Here's the testing module configuration for the spec file, src/app/welcome.component.spec.ts:
WelcomeComponent有与服务进行交互的决策逻辑,这样的逻辑让这个组件值得测试。下面是spec文件的测试模块配置,src/app/welcome.component.spec.ts:
src/app/welcome.component.spec.ts
This time, in addition to declaring the component-under-test,
the configuration adds a UserService provider to the providers list.
But not the real UserService.
这次,在测试配置里不但声明了被测试的组件,而且在providers数组中添加了UserService依赖。但不是真实的UserService。
Provide service test doubles
提供服务替身
A component-under-test doesn't have to be injected with real services. In fact, it is usually better if they are test doubles (stubs, fakes, spies, or mocks). The purpose of the spec is to test the component, not the service, and real services can be trouble.
被测试的组件不一定要注入真正的服务。实际上,服务的替身(stubs, fakes, spies或者mocks)通常会更加合适。 spec的主要目的是测试组件,而不是服务。真实的服务可能自身有问题。
Injecting the real UserService could be a nightmare.
The real service might ask the user for login credentials and
attempt to reach an authentication server.
These behaviors can be hard to intercept.
It is far easier and safer to create and register a test double in place of the real UserService.
注入真实的UserService有可能很麻烦。真实的服务可能询问用户登录凭据,也可能试图连接认证服务器。
可能很难处理这些行为。所以在真实的UserService的位置创建和注册UserService替身,会让测试更加容易和安全。
This particular test suite supplies a minimal UserService stub that satisfies the needs of the WelcomeComponent
and its tests:
这个测试套件提供了最小化的UserServicestub类,用来满足WelcomeComponent和它的测试的需求:
Get injected services
获取注入的服务
The tests need access to the (stub) UserService injected into the WelcomeComponent.
测试程序需要访问被注入到WelcomeComponent中的UserService(stub类)。
Angular has a hierarchical injection system.
There can be injectors at multiple levels, from the root injector created by the TestBed
down through the component tree.
Angular的注入系统是层次化的。
可以有很多层注入器,从根TestBed创建的注入器下来贯穿整个组件树。
The safest way to get the injected service, the way that always works,
is to get it from the injector of the component-under-test.
The component injector is a property of the fixture's DebugElement.
最安全并总是有效的获取注入服务的方法,是从被测试的组件的注入器获取。
组件注入器是fixture的DebugElement的属性。
WelcomeComponent's injector
TestBed.get
You may also be able to get the service from the root injector via TestBed.get.
This is easier to remember and less verbose.
But it only works when Angular injects the component with the service instance in the test's root injector.
Fortunately, in this test suite, the only provider of UserService is the root testing module,
so it is safe to call TestBed.get as follows:
你可以通过TestBed.get方法来从根注入器中获取服务。
它更容易被记住,也更加简介。
但是只有在Angular使用测试的根注入器中的那个服务实例来注入到组件时,它才有效。
幸运的是,在这个测试套件中,唯一的UserService提供商就是根测试模块,所以像下面这样调用TestBed.get很安全:
TestBed injector
The inject utility function is another way to get one or more services from the test root injector.
inject辅助函数方法是另外一种从测试的根注入器注入一个或多个服务到测试的方法。
For a use case in which inject and TestBed.get do not work,
see the section Override a component's providers, which
explains why you must get the service from the component's injector instead.
如果遇到了inject和TestBed.get无效,的情况,请到“重载组件提供商”一节。那里会解释为什么要改用组件的注入器来获取服务。
Always get the service from an injector
总是从注入器获取服务
Do not reference the userServiceStub object
that's provided to the testing module in the body of your test.
It does not work!
The userService instance injected into the component is a completely different object,
a clone of the provided userServiceStub.
请不要引用测试代码里提供给测试模块的userServiceStub对象。这样不行!
被注入组件的userService实例是完全不一样的对象,它提供的是userServiceStub的克隆。
Final setup and tests
最后的设置和测试程序
Here's the complete beforeEach using TestBed.get:
这里是使用TestBed.get的完整beforeEach:
src/app/welcome.component.spec.ts
And here are some tests:
下面是一些测试程序:
src/app/welcome.component.spec.ts
The first is a sanity test; it confirms that the stubbed UserService is called and working.
第一个测试程序是合法测试程序,它确认这个被模拟的UserService是否被调用和工作正常。
The second parameter to the Jasmine it (e.g., 'expected name') is an optional addendum.
If the expectation fails, Jasmine displays this addendum after the expectation failure message.
In a spec with multiple expectations, it can help clarify what went wrong and which expectation failed .
Jasmine的it方法的第二个参数(比如'expected name')是可选附加参数。
如果这个期待失败了,Jasmine在期待失败信息后面显示这个附加参数。
在拥有多个期待的spec中,它可以帮助澄清发生了什么错误,哪个期待失败了。
The remaining tests confirm the logic of the component when the service returns different values. The second test validates the effect of changing the user name. The third test checks that the component displays the proper message when there is no logged-in user.
接下来的测试程序确认当服务返回不同的值时组件的逻辑是否工作正常。 第二个测试程序验证变换用户名字的效果。 第三个测试程序检查如果用户没有登录,组件是否显示正确消息。
Back to top回到顶部Test a component with an async service
测试有异步服务的组件
Many services return values asynchronously. Most data services make an HTTP request to a remote server and the response is necessarily asynchronous.
许多服务异步返回值。大部分数据服务向远程服务器发起HTTP请求,响应必然是异步的。
The "About" view in this sample displays Mark Twain quotes.
The TwainComponent handles the display, delegating the server request to the TwainService.
本例的About视图显示马克吐温的名言。
TwainComponent组件处理视图,并委派TwainService向服务器发起请求。
Both are in the src/app/shared folder because the author intends to display Twain quotes on other pages someday.
Here is the TwainComponent.
两者都在app/shared目录里,因为作者计划将来在其它页面也显示马克吐温的名言。
下面是TwainComponent:
src/app/shared/twain.component.ts
The TwainService implementation is irrelevant for this particular test.
It is sufficient to see within ngOnInit that twainService.getQuote returns a promise, which means it is asynchronous.
TwainService的实现细节现在并不重要。
ngOnInit的twainService.getQuote返回承诺,所以显然它是异步的。
In general, tests should not make calls to remote servers.
They should emulate such calls. The setup in this src/app/shared/twain.component.spec.ts shows one way to do that:
一般来讲,测试程序不应该向远程服务器发请求。
它们应该仿真这样的请求。src/app/shared/twain.component.spec.ts里的配置是其中一种伪造方法:
src/app/shared/twain.component.spec.ts (setup)
Spying on the real service
刺探(Spy)真实服务
This setup is similar to the welcome.component.spec setup.
But instead of creating a stubbed service object, it injects the real service (see the testing module providers) and
replaces the critical getQuote method with a Jasmine spy.
本配置与welcome.component.spec配置类似。
但是与其伪造服务对象,它注入了真实的服务(参见测试模块的providers),并用Jasmine的spy替换关键的getQuote方法。
The spy is designed such that any call to getQuote receives an immediately resolved promise with a test quote.
The spy bypasses the actual getQuote method and therefore does not contact the server.
这个Spy的设计是,所有调用getQuote的方法都会收到立刻解析的承诺,得到一条预设的名言。Spy拦截了实际getQuote方法,所有它不会联系服务。
Faking a service instance and spying on the real service are both great options. Pick the one that seems easiest for the current test suite. Don't be afraid to change your mind.
伪造服务实例和刺探真实服务都是好方法。挑选一种对当前测试套件最简单的方法。你可以随时改变主意。
Spying on the real service isn't always easy, especially when the real service has injected dependencies. You can stub and spy at the same time, as shown in an example below.
刺探真实的服务往往并不容易,特别是真实的服务依赖其它服务时。 我们可以同时打桩和刺探,就像后面的例子那样。
Here are the tests with commentary to follow:
下面是接下来带有注解的测试程序:
src/app/shared/twain.component.spec.ts (tests)
Synchronous tests
同步测试程序
The first two tests are synchronous.
Thanks to the spy, they verify that getQuote is called after
the first change detection cycle during which Angular calls ngOnInit.
前两个测试程序是同步的。
在Spy的帮助下,它们验证了在Angular调用ngOnInit期间发生的第一次变更检测后,getQuote被调用了。
Neither test can prove that a value from the service is displayed. The quote itself has not arrived, despite the fact that the spy returns a resolved promise.
两者都不能证明被显示的值是服务提供的。 虽然spy返回了解析的承诺,名言本身还没有到来。
This test must wait at least one full turn of the JavaScript engine before the value becomes available. The test must become asynchronous.
这个测试程序必须等待JavaScript引擎一整个回合,返回值才会有效。该测试程序必须要变成异步的。
The async function in it
it里的async函数方法
Notice the async in the third test.
注意第三个测试程序的async方法。
src/app/shared/twain.component.spec.ts (async test)
The async function is one of the Angular testing utilities.
It simplifies coding of asynchronous tests by arranging for the tester's code to run in a special async test zone
as discussed earlier when it was called in a beforeEach.
async函数是Angular TestBed的一部分。通过将测试代码放到特殊的异步测试区域来运行,async函数简化了异步测试程序的代码。就像以前讨论过的,它会在beforeEach中被调用。
Although async does a great job of hiding asynchronous boilerplate,
some functions called within a test (such as fixture.whenStable) continue to reveal their asynchronous behavior.
虽然async做了很多工作来尽量隐藏异步特性,但在测试程序(比如fixture.whenStable)里面调用函数时,有时还是会体现它们的异步行为。
The fakeAsync alternative, covered below, removes this artifact and affords a more linear coding experience.
fakeAsync可选方法,正如下面解释的,进一步移除了异步行为,提供了更加直观的代码经验。
whenStable
The test must wait for the getQuote promise to resolve in the next turn of the JavaScript engine.
测试程序必须等待getQuote在JavaScript引擎的下一回合中被解析。
This test has no direct access to the promise returned by the call to twainService.getQuote
because it is buried inside TwainComponent.ngOnInit and therefore inaccessible to a test that
probes only the component API surface.
本测试对twainService.getQuote返回的承诺没有直接的访问,因为它被埋没在TwainComponent.ngOnInit里,
所以对于只测试组件API表面的测试来说,它是无法被访问的。
Fortunately, the getQuote promise is accessible to the async test zone ,
which intercepts all promises issued within the async method call no matter where they occur.
幸运的是,异步测试区域可以访问getQuote承诺,因为它拦截所有调用异步方法所发出的承诺,不管它们在哪儿。
The ComponentFixture.whenStable method returns its own promise, which resolves when the getQuote promise finishes.
In fact, the whenStable promise resolves when all pending asynchronous activities within this test complete — the definition of "stable."
ComponentFixture.whenStable方法返回它自己的承诺,它在getQuote承诺完成时被解析。实际上,“stable”的意思是当所有待处理异步行为完成时的状态,在“stable”后whenStable承诺被解析。
Then the test resumes and kicks off another round of change detection (fixture.detectChanges),
which tells Angular to update the DOM with the quote.
The getQuote helper method extracts the display element text and the expectation confirms that the text matches the test quote.
然后测试程序继续运行,并开始另一轮的变更检测(fixture.detectChanges),通知Angular使用名言来更新DOM。
getQuote辅助方法提取出显示元素文本,然后expect语句确认这个文本与预备的名言相符。
The fakeAsync function
fakeAsync函数方法
The fourth test verifies the same component behavior in a different way.
第四个测试程序用不同的方法验证同样的组件行为。
src/app/shared/twain.component.spec.ts (fakeAsync test)
Notice that fakeAsync replaces async as the it argument.
The fakeAsync function is another of the Angular testing utilities.
注意,在it的参数中,async被faceAsync替换。
fakeAsync是另一种Angular测试工具。
Like async, it takes a parameterless function and returns a function
that becomes the argument to the Jasmine it call.
和async一样,它也接受无参数函数并返回一个函数,变成Jasmine的it函数的参数。
The fakeAsync function enables a linear coding style by running the test body in a special fakeAsync test zone.
fakeAsync函数通过在特殊的fakeAsync测试区域运行测试程序,让测试代码更加简单直观。
The principle advantage of fakeAsync over async is that the test appears to be synchronous.
There is no then(...) to disrupt the visible flow of control.
The promise-returning fixture.whenStable is gone, replaced by tick().
对于async来说,fakeAsync最重要的好处是测试程序看起来像同步的。里面没有任何承诺。
没有then(...)链来打断控制流。
There are limitations. For example, you cannot make an XHR call from within a fakeAsync.
但是fakeAsync有局限性。比如,你不能从fakeAsync发起XHR请求。
The tick function
tick函数
The tick function is one of the Angular testing utilities and a companion to fakeAsync.
You can only call it within a fakeAsync body.
tick函数是Angular测试工具之一,是fakeAsync的同伴。
它只能在fakeAsync的主体中被调用。
Calling tick() simulates the passage of time until all pending asynchronous activities finish,
including the resolution of the getQuote promise in this test case.
调用tick()模拟时间的推移,直到全部待处理的异步任务都已完成,在这个测试案例中,包含getQuote承诺的解析。
It returns nothing. There is no promise to wait for.
Proceed with the same test code that appeared in the whenStable.then() callback.
它不返回任何结果。没有任何承诺需要等待。
直接执行与之前在whenStable.then()的回调函数里相同的代码。
Even this simple example is easier to read than the third test. To more fully appreciate the improvement, imagine a succession of asynchronous operations, chained in a long sequence of promise callbacks.
虽然这个例子非常简单,但是它已经比第三个测试程序更易阅读。
为了更充分的体会fakeAsync的好处,试想一下一连串的异步操作,被一长串的承诺回调链在一起。
jasmine.done
While the async and fakeAsync functions greatly
simplify Angular asynchronous testing,
you can still fall back to the traditional Jasmine asynchronous testing technique.
虽然async和fakeAsync函数大大的简化了异步测试,你仍然可以回退到传统的Jasmine异步测试技术上。
You can still pass it a function that takes a
done callback.
Now you are responsible for chaining promises, handling errors, and calling done at the appropriate moment.
你仍然可以将接受 done回调的函数传给it。
但是,你必须链接承诺、处理错误,并在适当的时候调用done。
Here is a done version of the previous two tests:
下面是上面两个测试程序的done版本:
src/app/shared/twain.component.spec.ts (done test)
Although there is no direct access to the getQuote promise inside TwainComponent,
the spy has direct access, which makes it possible to wait for getQuote to finish.
虽然我们对TwainComponent里的getQuote承诺没有直接访问,但是Spy有,所以才可能等待getQuote完成。
Writing test functions with done, while more cumbersome than async
and fakeAsync, is a viable and occasionally necessary technique.
For example, you can't call async or fakeAsync when testing
code that involves the intervalTimer, as is common when
testing async Observable methods.
写带有done回调的测试函数,虽然比async和fakeAsync函数笨拙,但是在少数偶然情况下却是很有必要的技巧。比如,当测试涉及intervalTimer的代码时,你就没法调用async和fakeAsync函数,在测试异步Observable函数时也一样。
Test a component with inputs and outputs
测试带有导入inputs和导出outputs的组件
A component with inputs and outputs typically appears inside the view template of a host component. The host uses a property binding to set the input property and an event binding to listen to events raised by the output property.
带有导入和导出的组件通常出现在宿主组件的视图模板中。 宿主使用属性绑定来设置输入属性,使用事件绑定来监听输出属性触发的事件。
The testing goal is to verify that such bindings work as expected. The tests should set input values and listen for output events.
测试的目的是验证这样的绑定和期待的那样正常工作。 测试程序应该设置导入值并监听导出事件。
The DashboardHeroComponent is a tiny example of a component in this role.
It displays an individual hero provided by the DashboardComponent.
Clicking that hero tells the DashboardComponent that the user has selected the hero.
DashboardHeroComponent是非常小的这种类型的例子组件。
它显示由DashboardCompoent提供的英雄个体。
点击英雄告诉DashbaordComponent用户已经选择了这个英雄。
The DashboardHeroComponent is embedded in the DashboardComponent template like this:
DashboardHeroComponent是这样内嵌在DashboardCompoent的模板中的:
src/app/dashboard/dashboard.component.html (excerpt)
The DashboardHeroComponent appears in an *ngFor repeater, which sets each component's hero input property
to the looping value and listens for the component's selected event.
DashboardHeroComponent在*ngFor循环中出现,设置每个组件的heroinput属性到迭代的值,并监听组件的selected事件。
Here's the component's definition:
下面是组件的定义:
src/app/dashboard/dashboard-hero.component.ts (component)
While testing a component this simple has little intrinsic value, it's worth knowing how. You can use one of these approaches:
虽然测试这么简单的组件没有什么内在价值,但是它的测试程序是值得学习的。 有下列候选测试方案:
Test it as used by
DashboardComponent.把它当作被
DashbaordComponent使用的组件来测试Test it as a stand-alone component.
把它当作独立的组件来测试
Test it as used by a substitute for
DashboardComponent.把它当作被
DashbaordComponent的替代组件使用的组件来测试
A quick look at the DashboardComponent constructor discourages the first approach:
简单看看DashbaordComponent的构造函数就否决了第一种方案:
src/app/dashboard/dashboard.component.ts (constructor)
The DashboardComponent depends on the Angular router and the HeroService.
You'd probably have to replace them both with test doubles, which is a lot of work.
The router seems particularly challenging.
DashbaordComponent依赖Angular路由器和HeroService服务。
你必须使用测试替身替换它们两个,似乎过于复杂了。
路由器尤其具有挑战性。
The discussion below covers testing components that require the router.
下面 覆盖了如何测试带有路由器的组件。
The immediate goal is to test the DashboardHeroComponent, not the DashboardComponent,
so, try the second and third options.
当前的任务是测试DashboardHeroComponent组件,而非DashbaordComponent,所以无需做不必要的努力。
让我们尝试第二和第三种方案。
Test DashboardHeroComponent stand-alone
独立测试DashboardHeroComponent
Here's the spec file setup.
下面是spec文件的设置。
src/app/dashboard/dashboard-hero.component.spec.ts (setup)
The async beforeEach was discussed above.
Having compiled the components asynchronously with compileComponents, the rest of the setup
proceeds synchronously in a second beforeEach, using the basic techniques described earlier.
异步beforeEach已经在上面讨论过。
在使用compileComponents异步编译完组件后,接下来的设置执行另一个同步的beforeEach,使用之前解释过的基本知识。
Note how the setup code assigns a test hero (expectedHero) to the component's hero property, emulating
the way the DashboardComponent would set it via the property binding in its repeater.
注意代码是如何将模拟英雄(expectedHero)赋值给组件的hero属性的,模拟了DashbaordComponent在它的迭代器中通过属性绑定的赋值方式。
The first test follows:
紧接着第一个测试程序:
src/app/dashboard/dashboard-hero.component.spec.ts (name test)
It verifies that the hero name is propagated to template with a binding.
Because the template passes the hero name through the Angular UpperCasePipe,
the test must match the element value with the uppercased name:
它验证了英雄名字通过绑定被传递到模板了。这里有个额外步骤。模板将英雄名字传给Angular的UpperCasePipe,
所以测试程序必须使用大写名字来匹配元素的值:
This small test demonstrates how Angular tests can verify a component's visual representation—something not possible with isolated unit tests—at low cost and without resorting to much slower and more complicated end-to-end tests.
这个小测试演示了Angular测试是如何验证组件的视图表现的 —— 这是孤立的单元测试无法实现的 —— 它成本低,而且无需依靠更慢、更复杂的端对端测试。
The second test verifies click behavior. Clicking the hero should raise a selected event that the
host component (DashboardComponent presumably) can hear:
第二个测试程序验证点击行为。点击英雄应该出发selected事件,可供宿主组件(DashbaordComponent)监听:
src/app/dashboard/dashboard-hero.component.spec.ts (click test)
The component exposes an EventEmitter property. The test subscribes to it just as the host component would do.
这个组件公开EventEmitter属性。测试程序像宿主组件那样来描述它。
The heroEl is a DebugElement that represents the hero <div>.
The test calls triggerEventHandler with the "click" event name.
The "click" event binding responds by calling DashboardHeroComponent.click().
heroEl是个DebugElement,它代表了英雄所在的<div>。
测试程序用“click”事件名字来调用triggerEventHandler。
调用DashboardHeroComponent.click()时,“click”事件绑定作出响应。
If the component behaves as expected, click() tells the component's selected property to emit the hero object,
the test detects that value through its subscription to selected, and the test should pass.
如果组件像期待的那样工作,click()通知组件的selected属性就会发出hero对象,测试程序通过订阅selected事件而检测到这个值,所以测试应该成功。
triggerEventHandler
The Angular DebugElement.triggerEventHandler can raise any data-bound event by its event name.
The second parameter is the event object passed to the handler.
Angular的DebugElement.triggerEventHandler可以用事件的名字触发任何数据绑定事件。
第二个参数是传递给事件处理器的事件对象。
In this example, the test triggers a "click" event with a null event object.
本例中,测试程序用null事件对象触发“click”事件。
The test assumes (correctly in this case) that the runtime
event handler—the component's click() method—doesn't
care about the event object.
测试程序假设(在这里应该这样)运行时间的事件处理器——组件的click()方法——不关心事件对象。
Other handlers are less forgiving. For example, the RouterLink
directive expects an object with a button property
that identifies which mouse button was pressed.
This directive throws an error if the event object doesn't do this correctly.
其它处理器将会更加严格。
比如,RouterLink指令期待事件对象,并且该对象具有button属性,代表了已被按下的鼠标按钮。
如果该事件对象不具备上面的条件,指令便会抛出错误。
Clicking a button, an anchor, or an arbitrary HTML element is a common test task.
点击按钮、链接或者任意HTML元素是很常见的测试任务。
Make that easy by encapsulating the click-triggering process in a helper such as the click function below:
把click触发过程封装到辅助方法中可以简化这个任务,比如下面的click辅助方法:
testing/index.ts (click helper)
The first parameter is the element-to-click. If you wish, you can pass a
custom event object as the second parameter. The default is a (partial)
left-button mouse event object
accepted by many handlers including the RouterLink directive.
第一个参数是用来点击的元素。如果你愿意,可以将自定义的事件对象传递给第二个参数。
默认的是(局部的)鼠标左键事件对象,
它被许多事件处理器接受,包括RouterLink指令。
The click() helper function is not one of the Angular testing utilities.
It's a function defined in this guide's sample code.
All of the sample tests use it.
If you like it, add it to your own collection of helpers.
click()辅助函数不是Angular测试工具之一。
它是在本章的例子代码中定义的函数方法,被所有测试例子所用。
如果你喜欢它,将它添加到你自己的辅助函数集。
Here's the previous test, rewritten using this click helper.
下面是使用了click辅助函数重新编写的上一个测试程序:
src/app/dashboard/dashboard-hero.component.spec.ts (click test revised)
Test a component inside a test host component
在测试宿主组件中测试组件
在测试宿主组件中测试组件
In the previous approach, the tests themselves played the role of the host DashboardComponent.
But does the DashboardHeroComponent work correctly when properly data-bound to a host component?
在前面的方法中,测试本身扮演了宿主组件DashbaordComponent的角色。
一种挥之不去的疑虑仍然存在:当正常数据绑定到宿主组件时,DashboardHeroComponent还会正常工作吗?
Testing with the actual DashboardComponent host is doable but seems more trouble than its worth.
It's easier to emulate the DashboardComponent host with a test host like this one:
使用实际的DashbaordComponent宿主来测试是可行的,但是这么做似乎不合算。
像下面这样使用测试宿主组件来模拟DashbaordComponent显得更加容易:
src/app/dashboard/dashboard-hero.component.spec.ts (test host)
The test host binds to DashboardHeroComponent as the DashboardComponent would but without
the distraction of the Router, the HeroService, or even the *ngFor repeater.
测试宿主组件和DashboardComponent一样绑定DashboardHeroComponent,但是不用理会Router、HeroService服务,甚至*ngFor循环。
The test host sets the component's hero input property with its test hero.
It binds the component's selected event with its onSelected handler,
which records the emitted hero
in its selectedHero property. Later, the tests check that property to verify that the
DashboardHeroComponent.selected event emitted the right hero.
测试宿主将组件的hero导入属性设置为它的模拟英雄。
它将组件的selected事件绑定到它的onSelected处理器,使用selectedHero属性来记录发送来的英雄。
然后测试检查这个属性来验证DashboardHeroComponent.selected事件确实发送了正确的英雄。
The setup for the test-host tests is similar to the setup for the stand-alone tests:
配置使用测试宿主的测试程序与配置孤立测试相似:
src/app/dashboard/dashboard-hero.component.spec.ts (test host setup)
This testing module configuration shows two important differences:
这个测试模块配置展示了两个非常重要的区别:
It declares both the
DashboardHeroComponentand theTestHostComponent.它同时声明了
DashboardHeroComponent和TestHostComponent。It creates the
TestHostComponentinstead of theDashboardHeroComponent.它创建了
TestHostComponent,而非DashboardHeroComponent。
The createComponent returns a fixture that holds an instance of TestHostComponent instead of an instance of DashboardHeroComponent.
createComponent返回的fixture里有TestHostComponent实例,而非DashboardHeroComponent组件实例。
Creating the TestHostComponent has the side-effect of creating a DashboardHeroComponent
because the latter appears within the template of the former.
The query for the hero element (heroEl) still finds it in the test DOM,
albeit at greater depth in the element tree than before.
当然,创建TestHostComponent有创建DashboardHeroComponent的副作用,因为后者出现在前者的模板中。
英雄元素(heroEl)的查询语句仍然可以在测试DOM中找到它,尽管元素树比以前更深。
The tests themselves are almost identical to the stand-alone version:
这些测试本身和它们的孤立版本几乎相同:
src/app/dashboard/dashboard-hero.component.spec.ts (test-host)
Only the selected event test differs. It confirms that the selected DashboardHeroComponent hero
really does find its way up through the event binding to the host component.
只有selected事件的测试不一样。它确保被选择的DashboardHeroComponent英雄确实通过事件绑定被传递到宿主组件。
Test a routed component
测试带路由器的组件
Testing the actual DashboardComponent seemed daunting because it injects the Router.
测试实际的DashbaordComponent似乎令人生畏,因为它注入了Router。
src/app/dashboard/dashboard.component.ts (constructor)
It also injects the HeroService, but faking that is a familiar story.
The Router has a complicated API and is entwined with other services and application preconditions.
它同时还注入了HeroService,但是我们已经知道如何伪造它。
Router的API非常复杂,并且它缠绕了其它服务和许多应用的先决条件。
Fortunately, the DashboardComponent isn't doing much with the Router
幸运的是,DashbaordComponent没有使用Router做很多事情。
src/app/dashboard/dashboard.component.ts (goToDetail)
This is often the case. As a rule you test the component, not the router, and care only if the component navigates with the right address under the given conditions. Stubbing the router with a test implementation is an easy option. This should do the trick:
通常都是这样的。原则上,你测试的是组件,不是路由器,应该只关心在指定的条件下,组件是否导航到正确的地址。 用模拟类来替换路由器是一种简单的方案。下面的代码应该可以:
src/app/dashboard/dashboard.component.spec.ts (Router Stub)
Now set up the testing module with the test stubs for the Router and HeroService, and
create a test instance of the DashboardComponent for subsequent testing.
现在我们来利用Router和HeroService的测试stub类来配置测试模块,并为接下来的测试创建DashboardComponent的测试实例。
src/app/dashboard/dashboard.component.spec.ts (compile and create)
The following test clicks the displayed hero and confirms (with the help of a spy) that Router.navigateByUrl is called with the expected url.
下面的测试程序点击显示的英雄,并利用spy来确认Router.navigateByUrl被调用了,而且传进的url是所期待的值。
src/app/dashboard/dashboard.component.spec.ts (navigate test)
The inject function
inject函数
Notice the inject function in the second it argument.
注意第二个it参数里面的inject函数。
The inject function is one of the Angular testing utilities.
It injects services into the test function where you can alter, spy on, and manipulate them.
inject函数是Angular测试工具之一。
它注入服务到测试函数,以供修改、监视和操纵。
The inject function has two parameters:
inject函数有两个参数:
An array of Angular dependency injection tokens.
一列数组,包含了Angular依赖注入令牌
A test function whose parameters correspond exactly to each item in the injection token array.
一个测试函数,它的参数与注入令牌数组里的每个项目严格的一一对应。
The inject function uses the current TestBed injector and can only return services provided at that level.
It does not return services from component providers.
inject函数使用当前TestBed注入器,并且只返回这个级别提供的服务。
它不会返回组件提供商提供的服务。
This example injects the Router from the current TestBed injector.
That's fine for this test because the Router is, and must be, provided by the application root injector.
这个例子通过当前的TestBed注入器来注入Router。
对这个测试程序来说,这是没问题的,因为Router是(也必须是)由应用的根注入器来提供。
If you need a service provided by the component's own injector, call fixture.debugElement.injector.get instead:
如果你需要组件自己的注入器提供的服务,调用fixture.debugElement.injector.get:
Component's injector
Use the component's own injector to get the service actually injected into the component.
使用组件自己的注入器来获取实际注入到组件的服务。
The inject function closes the current TestBed instance to further configuration.
You cannot call any more TestBed configuration methods, not configureTestingModule
nor any of the override... methods. The TestBed throws an error if you try.
inject函数关闭当前TestBed实例,使它无法再被配置。
你不能再调用任何TestBed配置方法、configureTestModule或者任何override...方法,否则TestBed将抛出错误。
Do not configure the TestBed after calling inject.
不要在调用inject以后再试图配置TestBed。
Test a routed component with parameters
测试带有路由和路由参数的组件
Clicking a Dashboard hero triggers navigation to heroes/:id, where :id
is a route parameter whose value is the id of the hero to edit.
That URL matches a route to the HeroDetailComponent.
点击Dashboard英雄触发导航到heros/:id,其中:id是路由参数,它的值是进行编辑的英雄的id。
这个URL匹配到HeroDetailComponent的路由。
The router pushes the :id token value into the ActivatedRoute.params Observable property,
Angular injects the ActivatedRoute into the HeroDetailComponent,
and the component extracts the id so it can fetch the corresponding hero via the HeroDetailService.
Here's the HeroDetailComponent constructor:
路由器将:id令牌的值推送到ActivatedRoute.params可观察属性里,
Angular注入ActivatedRoute到HeroDetailComponent中,
然后组件提取id,这样它就可以通过HeroDetailService获取相应的英雄。
下面是HeroDetailComponent的构造函数:
src/app/hero/hero-detail.component.ts (constructor)
HeroDetailComponent subscribes to ActivatedRoute.params changes in its ngOnInit method.
HeroDetailComponent在它的ngOnInit方法中监听ActivatedRoute.params的变化。
src/app/hero/hero-detail.component.ts (ngOnInit)
The expression after route.params chains an Observable operator that plucks the id from the params
and then chains a forEach operator to subscribe to id-changing events.
The id changes every time the user navigates to a different hero.
route.params之后的表达式链接了可观察操作符,它从params中提取id,然后链接forEach操作符来订阅id变化事件。
每次id变化时,用户被导航到不同的英雄。
The forEach passes the new id value to the component's getHero method (not shown)
which fetches a hero and sets the component's hero property.
If theid parameter is missing, the pluck operator fails and the catch treats failure as a request to edit a new hero.
forEach将新的id值传递到组件的getHero方法(这里没有列出来),它获取英雄并将它赋值到组件的hero属性。
如果id参数无效,pluck操作符就会失败,catch将失败当作创建新英雄来处理。
The Router guide covers ActivatedRoute.params in more detail.
路由器章更详尽的讲述了ActivatedRoute.params。
A test can explore how the HeroDetailComponent responds to different id parameter values
by manipulating the ActivatedRoute injected into the component's constructor.
通过操纵被注入到组件构造函数的ActivatedRoute服务,测试程序可以探索HeroDetailComponent是如何对不同的id参数值作出响应的。
By now you know how to stub the Router and a data service.
Stubbing the ActivatedRoute follows the same pattern except for a complication:
the ActivatedRoute.params is an Observable.
现在,你已经知道如何模拟Router和数据服务。
模拟ActivatedRoute遵循类似的模式,但是有个额外枝节:ActivatedRoute.params是可观察对象。
Create an Observable test double
可观察对象的测试替身
The hero-detail.component.spec.ts relies on an ActivatedRouteStub to set ActivatedRoute.params values for each test.
This is a cross-application, re-usable test helper class.
Consider placing such helpers in a testing folder sibling to the app folder.
This sample keeps ActivatedRouteStub in testing/router-stubs.ts:
hero-detail.component.spec.ts依赖ActivatedRouteStub来为每个测试程序设置ActivatedRoute.params值。
它是跨应用、可复用的测试辅助类。
我们建议将这样的辅助类放到app目录下的名为testing的目录。
本例把ActivatedRouteStub放到testing/router-stubs.ts:
testing/router-stubs.ts (ActivatedRouteStub)
Notable features of this stub are:
这个stub类有下列值得注意的特征:
The stub implements only two of the
ActivatedRoutecapabilities:paramsandsnapshot.params.这个stub类只实现
ActivatedRoute的两个功能:params和snapshot.params。BehaviorSubject drives the stub's
paramsObservable and returns the same value to everyparamssubscriber until it's given a new value.BehaviorSubject驱使这个stub类的
params可观察对象,并为每个params的订阅者返回同样的值,直到它接受到新值。The
HeroDetailComponentchains its expressions to this stubparamsObservable which is now under the tester's control.HeroDetailComponent链接它的表达式到这个stub类的params可观察对象,该对象现在被测试者的控制之下。Setting the
testParamsproperty causes thesubjectto push the assigned value intoparams. That triggers theHeroDetailComponentparams subscription, described above, in the same way that navigation does.设置
testParams属性导致subject将指定的值推送进params。它触发上面描述过的HeroDetailComponent的params订阅,和导航的方式一样。Setting the
testParamsproperty also updates the stub's internal value for thesnapshotproperty to return.设置
testParams属性同时更新这个stub类内部值,用于snapshot属性的返回。
The snapshot is another popular way for components to consume route parameters.
snapshot是组件使用路由参数的另一种流行的方法。
The router stubs in this guide are meant to inspire you. Create your own stubs to fit your testing needs.
本章的路由器stub类是为了给你灵感。创建你自己的stub类,以适合你的测试需求。
Testing with the Observable test double
测试可观察对象的替身
Here's a test demonstrating the component's behavior when the observed id refers to an existing hero:
下面的测试程序是演示组件在被观察的id指向现有英雄时的行为:
src/app/hero/hero-detail.component.spec.ts (existing id)
The createComponent method and page object are discussed in the next section.
Rely on your intuition for now.
下一节将解释createComponent方法和page对象,现在暂时跟着自己的直觉走。
When the id cannot be found, the component should re-route to the HeroListComponent.
The test suite setup provided the same RouterStub described above which spies on the router without actually navigating.
This test supplies a "bad" id and expects the component to try to navigate.
当无法找到id时,组件应该重新导航到HeroListComponent。
该测试套件配置与上面描述的RouterStub一样,它在不实际导航的情况下刺探路由器。
该测试程序提供了“坏”的id,期望组件尝试导航。
src/app/hero/hero-detail.component.spec.ts (bad id)
While this app doesn't have a route to the HeroDetailComponent that omits the id parameter, it might add such a route someday.
The component should do something reasonable when there is no id.
虽然本应用没有在缺少id参数的时候,继续导航到HeroDetailComponent的路由,但是,将来它可能会添加这样的路由。
当没有id时,该组件应该作出合理的反应。
In this implementation, the component should create and display a new hero.
New heroes have id=0 and a blank name. This test confirms that the component behaves as expected:
在本例中,组件应该创建和显示新英雄。
新英雄的id为零,name为空。本测试程序确认组件是按照预期的这样做的:
src/app/hero/hero-detail.component.spec.ts (no id)
Inspect and download all of the guide's application test code with this
到
Use a page object to simplify setup
使用page对象来简化配置
The HeroDetailComponent is a simple view with a title, two hero fields, and two buttons.
HeroDetailComponent是带有标题、两个英雄字段和两个按钮的简单视图。
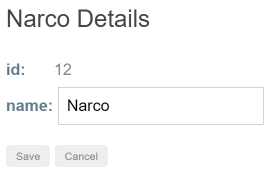
But there's already plenty of template complexity.
但是它已经有很多模板复杂性。
src/app/hero/hero-detail.component.html
To fully exercise the component, the test needs a lot of setup:
要彻底测试该组件,测试程序需要一系列设置:
It must wait until a hero arrives before
*ngIfallows any element in DOM.它必须在
*ngIf允许元素进入DOM之前,等待hero的到来It needs references to the title
<span>and the name<input>so it can inspect their values.它需要标题名字span和名字输入框元素的引用,用来检查它们的值
It needs references to the two buttons so it can click them.
它需要两个按钮的引用,以便点击它们
It needs spies for some of the component and router methods.
刺探(spy)组件和路由器的方法
Even a small form such as this one can produce a mess of tortured conditional setup and CSS element selection.
即使是像这样一个很小的表单,也能产生令人疯狂的错综复杂的条件设置和CSS元素选择。
Tame the madness with a Page class that simplifies access to component properties and encapsulates the logic that sets them.
Here's the Page class for the hero-detail.component.spec.ts
通过简化组件属性的访问和封装设置属性的逻辑,Page类可以轻松解决这个令人抓狂的难题。
下面是为hero-detail.component.spec.ts准备的page类:
src/app/hero/hero-detail.component.spec.ts (Page)
Now the important hooks for component manipulation and inspection are neatly organized and accessible from an instance of Page.
现在,用来操作和检查组件的重要钩子都被井然有序的组织起来了,可以通过page实例来使用它们。
A createComponent method creates a page objectand fills in the blanks once the hero arrives.
createComponent方法创建page,在hero到来时,自动填补空白。
src/app/hero/hero-detail.component.spec.ts (createComponent)
The observable tests in the previous section demonstrate how createComponent and page
keep the tests short and on message.
There are no distractions: no waiting for promises to resolve and no searching the DOM for element values to compare.
上一节的可观察对象测试展示了createComponent和page如何让测试程序简短和即时。
没有任何干扰:无需等待承诺的解析,也没有搜索DOM元素值进行比较。
Here are a few more HeroDetailComponent tests to drive the point home.
这里是一些更多的HeroDetailComponent测试程序,进一步的展示了这一点。
src/app/hero/hero-detail.component.spec.ts (selected tests)
Setup with module imports
模块导入imports的配置
Earlier component tests configured the testing module with a few declarations like this:
此前的组件测试程序使用了一些declarations来配置模块,就像这样:
src/app/dashboard/dashboard-hero.component.spec.ts (config)
The DashboardComponent is simple. It needs no help.
But more complex components often depend on other components, directives, pipes, and providers
and these must be added to the testing module too.
DashbaordComponent非常简单。它不需要帮助。
但是更加复杂的组件通常依赖其它组件、指令、管道和提供商,
所以这些必须也被添加到测试模块中。
Fortunately, the TestBed.configureTestingModule parameter parallels
the metadata passed to the @NgModule decorator
which means you can also specify providers and imports.
幸运的是,TestBed.configureTestingModule参数与传入@NgModule装饰器的元数据一样,也就是所你也可以指定providers和imports.
The HeroDetailComponent requires a lot of help despite its small size and simple construction.
In addition to the support it receives from the default testing module CommonModule, it needs:
虽然HeroDetailComponent很小,结构也很简单,但是它需要很多帮助。
除了从默认测试模块CommonModule中获得的支持,它还需要:
NgModeland friends in theFormsModuleto enable two-way data binding.FormsModule里的NgModel和其它,来进行双向数据绑定The
TitleCasePipefrom thesharedfolder.shared目录里的TitleCasePipeRouter services (which these tests are stubbing).
一些路由器服务(测试程序将stub伪造它们)
Hero data access services (also stubbed).
英雄数据访问服务(同样被stub伪造了)
One approach is to configure the testing module from the individual pieces as in this example:
一种方法是在测试模块中一一配置,就像这样:
src/app/hero/hero-detail.component.spec.ts (FormsModule setup)
Because many app components need the FormsModule and the TitleCasePipe, the developer created
a SharedModule to combine these and other frequently requested parts.
The test configuration can use the SharedModule too as seen in this alternative setup:
因为许多应用组件需要FormsModule和TitleCasePipe,所以开发者创建了SharedModule来合并它们和一些频繁需要的部件。
测试配置也可以使用SharedModule,请看下面另一种配置:
src/app/hero/hero-detail.component.spec.ts (SharedModule setup)
It's a bit tighter and smaller, with fewer import statements (not shown).
它的导入声明少一些(未显示),稍微干净一些,小一些。
Import the feature module
导入特性模块
The HeroDetailComponent is part of the HeroModule Feature Module that aggregates more of the interdependent pieces
including the SharedModule.
Try a test configuration that imports the HeroModule like this one:
HeroDetailComponent是HeroModule特性模块的一部分,它组合了更多互相依赖的部件,包括SharedModule。
试试下面这个导入HeroModule的测试配置:
src/app/hero/hero-detail.component.spec.ts (HeroModule setup)
That's really crisp. Only the test doubles in the providers remain. Even the HeroDetailComponent declaration is gone.
这样特别清爽。只有providers里面的测试替身被保留。连HeroDetailComponent声明都消失了。
In fact, if you try to declare it, Angular throws an error because
HeroDetailComponent is declared in both the HeroModule and the DynamicTestModule (the testing module).
事实上,如果里试图声明它,Angular会抛出错误,因为HeroDetailComponent已经在HeroModule和测试模块的DynamicTestModule中声明。
Importing the component's feature module is often the easiest way to configure the tests, especially when the feature module is small and mostly self-contained, as feature modules should be.
导入组件的特性模块通常是最简单的配置测试的方法, 尤其是当特性模块很小而且几乎自包含时...特性模块应该是自包含的。
Override a component's providers
重载组件的提供商
The HeroDetailComponent provides its own HeroDetailService.
HeroDetailComponent提供自己的HeroDetailService服务。
src/app/hero/hero-detail.component.ts (prototype)
It's not possible to stub the component's HeroDetailService in the providers of the TestBed.configureTestingModule.
Those are providers for the testing module, not the component. They prepare the dependency injector at the fixture level.
在TestBed.configureTestingModule的providers中stub伪造组件的HeroDetailService是不可行的。
这些是测试模块的提供商,而非组件的。组件级别的供应商应该在fixture级别准备的依赖注入器。
Angular creates the component with its own injector, which is a child of the fixture injector.
It registers the component's providers (the HeroDetailService in this case) with the child injector.
A test cannot get to child injector services from the fixture injector.
And TestBed.configureTestingModule can't configure them either.
Angular创建组件时,该组件有自己的注入器,它是fixture注入器的子级。
Angular使用这个子级注入器来注册组件的提供商(也就是HeroDetailService)。
测试程序无法从fixture的注入器获取这个子级注入器。
而且TestBed.configureTestingModule也无法配置它们。
Angular has been creating new instances of the real HeroDetailService all along!
Angular始终都在创建真实HeroDetailService的实例。
These tests could fail or timeout if the HeroDetailService made its own XHR calls to a remote server.
There might not be a remote server to call.
如果HeroDetailService向远程服务器发出自己的XHR请求,这些测试可能会失败或者超时。
这个远程服务器可能根本不存在。
Fortunately, the HeroDetailService delegates responsibility for remote data access to an injected HeroService.
幸运的是,HeroDetailService将远程数据访问的责任交给了注入进来的HeroService。
src/app/hero/hero-detail.service.ts (prototype)
The previous test configuration replaces the real HeroService with a FakeHeroService
that intercepts server requests and fakes their responses.
之前的测试配置将真实的HeroService替换为FakeHeroService,拦截了服务起请求,伪造了它们的响应。
What if you aren't so lucky. What if faking the HeroService is hard?
What if HeroDetailService makes its own server requests?
如果我们没有这么幸运怎么办?如果伪造HeroService很难怎么办?如果HeroDetailService自己发出服务器请求怎么办?
The TestBed.overrideComponent method can replace the component's providers with easy-to-manage test doubles
as seen in the following setup variation:
TestBed.overrideComponent方法可以将组件的providers替换为容易管理的测试替身,参见下面的设置变化:
src/app/hero/hero-detail.component.spec.ts (Override setup)
Notice that TestBed.configureTestingModule no longer provides a (fake) HeroService because it's not needed.
注意,TestBed.configureTestingModule不再提供(伪造)HeroService,因为已经没有必要了。
The overrideComponent method
overrideComponent方法
Focus on the overrideComponent method.
注意这个overrideComponent方法。
src/app/hero/hero-detail.component.spec.ts (overrideComponent)
It takes two arguments: the component type to override (HeroDetailComponent) and an override metadata object.
The overide metadata object is a generic defined as follows:
它接受两个参数:要重载的组件类型(HeroDetailComponent)和用于重载的元数据对象。
重载元数据对象是泛型类,就像这样:
A metadata override object can either add-and-remove elements in metadata properties or completely reset those properties.
This example resets the component's providers metadata.
元数据重载对象可以添加和删除元数据属性的项目,也可以彻底重设这些属性。
这个例子重新设置了组件的providers元数据。
The type parameter, T, is the kind of metadata you'd pass to the @Component decorator:
这个类型参数,T,是你会传递给@Component装饰器的元数据的类型。
Provide a spy stub (HeroDetailServiceSpy)
提供一个刺探桩(Spy stub)(HeroDetailServiceSpy)
This example completely replaces the component's providers array with a new array containing a HeroDetailServiceSpy.
这个例子把组件的providers数组完全替换成了一个包含HeroDetailServiceSpy的新数组。
The HeroDetailServiceSpy is a stubbed version of the real HeroDetailService
that fakes all necessary features of that service.
It neither injects nor delegates to the lower level HeroService
so there's no need to provide a test double for that.
HeroDetailServiceSpy是实际HeroDetailService服务的桩版本,它伪造了该服务的所有必要特性。
但它既不需要注入也不会委托给低层的HeroService服务,因此我们不用为HeroService提供测试替身。
The related HeroDetailComponent tests will assert that methods of the HeroDetailService
were called by spying on the service methods.
Accordingly, the stub implements its methods as spies:
通过对该服务的方法进行刺探,HeroDetailComponent的关联测试将会对HeroDetailService是否被调用过进行断言。
因此,这个桩类会把它的方法实现为刺探方法:
src/app/hero/hero-detail.component.spec.ts (HeroDetailServiceSpy)
The override tests
重载的测试程序
Now the tests can control the component's hero directly by manipulating the spy-stub's testHero
and confirm that service methods were called.
现在,测试程序可以通过操控stub的testHero,直接控制组件的英雄,并确保服务的方法被调用过。
src/app/hero/hero-detail.component.spec.ts (override tests)
More overrides
更多重载
The TestBed.overrideComponent method can be called multiple times for the same or different components.
The TestBed offers similar overrideDirective, overrideModule, and overridePipe methods
for digging into and replacing parts of these other classes.
TestBed.overrideComponent方法可以在相同或不同的组件中被反复调用。
TestBed还提供了类似的overrideDirective、overrideModule和overridePipe方法,用来深入并重载这些其它类的部件。
Explore the options and combinations on your own.
自己探索这些选项和组合。
Back to top回到顶部Test a RouterOutlet component
测试带有RouterOutlet的组件
The AppComponent displays routed components in a <router-outlet>.
It also displays a navigation bar with anchors and their RouterLink directives.
AppComponent在<router-outlet>中显示导航组件。
它还显示了导航条,包含了链接和它们的RouterLink指令。
src/app/app.component.html
The component class does nothing.
组件的类没有做任何事。
src/app/app.component.ts
Unit tests can confirm that the anchors are wired properly without engaging the router. See why this is worth doing below.
在不涉及路由的情况下,单元测试可以确认链接的设置是否正确。 参见下面的内容,了解为什么值得这么做。
Stubbing unneeded components
stub伪造不需要的组件
The test setup should look familiar.
该测试配置应该看起来很眼熟:
src/app/app.component.spec.ts (Stub Setup)
The AppComponent is the declared test subject.
AppComponent是被声明的测试对象。
The setup extends the default testing module with one real component (BannerComponent) and several stubs.
使用一个真实的组件(BannerComponent)和几个stub,该配置扩展了默认测试模块。
BannerComponentis simple and harmless to use as is.原样使用
BannerComponent非常简单而且无害。The real
WelcomeComponenthas an injected service.WelcomeStubComponentis a placeholder with no service to worry about.真实的
WelcomeComponent有被注入的服务。WelcomeStubComponent是无服务的替代品。The real
RouterOutletis complex and errors easily. TheRouterOutletStubComponent(intesting/router-stubs.ts) is safely inert.真实的
RouterOutlet很复杂而且容易出错。testing/router-stubs.ts里的RouterOutletStubComponent是安全的替代品。
The component stubs are essential.
Without them, the Angular compiler doesn't recognize the <app-welcome> and <router-outlet> tags
and throws an error.
组件stub替代品很关键。
没有它们,Angular编译器无法识别<app-welcome和<router-outlet>标签,抛出错误。
Stubbing the RouterLink
Stub伪造RouterLink
The RouterLinkStubDirective contributes substantively to the test:
RouterLinkStubDirective为测试作出了重要的贡献:
testing/router-stubs.ts (RouterLinkStubDirective)
The host metadata property wires the click event of the host element (the <a>) to the directive's onClick method.
The URL bound to the [routerLink] attribute flows to the directive's linkParams property.
Clicking the anchor should trigger the onClick method which sets the telltale navigatedTo property.
Tests can inspect that property to confirm the expected click-to-navigation behavior.
host元数据属性将宿主元素(<a>)的click事件与指令的onClick方法关联起来。
绑定到[routerLink]的URL属性被传递到指令的linkParams属性。
点击这个链接应该能触发onClick方法,从而设置navigatedTo属性。
测试程序可以查看这个属性,来确认期望的点击导航行为。
By.directive and injected directives
By.directive和注入的指令
A little more setup triggers the initial data binding and gets references to the navigation links:
再一步配置触发了数据绑定的初始化,获取导航链接的引用:
src/app/app.component.spec.ts (test setup)
Two points of special interest:
特别值得注意的两点:
You can locate elements by directive, using
By.directive, not just by css selectors.你还可以按指令定位元素,使用
By.directive,而不仅仅是通过CSS选择器。You can use the component's dependency injector to get an attached directive because Angular always adds attached directives to the component's injector.
你可以使用组件的依赖注入器来获取附加的指令,因为Angular总是将附加组件添加到组件的注入器中。
Here are some tests that leverage this setup:
下面是一些使用这个配置的测试程序:
src/app/app.component.spec.ts (selected tests)
The "click" test in this example is worthless.
It works hard to appear useful when in fact it
tests the RouterLinkStubDirective rather than the component.
This is a common failing of directive stubs.
本例中的“click”测试程序其实毫无价值。
它显得很有用,但是事实上,它测试的是RouterLinkStubDirective,而非测试组件。
这是指令stub的通病。
It has a legitimate purpose in this guide.
It demonstrates how to find a RouterLink element, click it, and inspect a result,
without engaging the full router machinery.
This is a skill you may need to test a more sophisticated component, one that changes the display,
re-calculates parameters, or re-arranges navigation options when the user clicks the link.
在本章中,它有存在的必要。
它演示了如何在不涉及完整路由器机制的情况下,如何找到RouterLink元素、点击它并检查结果。
要测试更复杂的组件,你可能需要具备这样的能力,能改变视图和重新计算参数,或者当用户点击链接时,有能力重新安排导航选项。
What good are these tests?
这些测试有什么好处?
Stubbed RouterLink tests can confirm that a component with links and an outlet is setup properly,
that the component has the links it should have, and that they are all pointing in the expected direction.
These tests do not concern whether the app will succeed in navigating to the target component when the user clicks a link.
stub伪造的RouterLink测试可以确认带有链接和outlet的组件的设置的正确性,确认组件有应该有的链接,确认它们都指向了正确的方向。
这些测试程序不关心用户点击链接时,应用是否会成功的导航到目标组件。
Stubbing the RouterLink and RouterOutlet is the best option for such limited testing goals.
Relying on the real router would make them brittle.
They could fail for reasons unrelated to the component.
For example, a navigation guard could prevent an unauthorized user from visiting the HeroListComponent.
That's not the fault of the AppComponent and no change to that component could cure the failed test.
对于这样局限的测试目标,stub伪造RouterLink和RouterOutlet是最佳选择。
依靠真正的路由器会让它们很脆弱。
它们可能因为与组件无关的原因而失败。
例如,一个导航守卫可能防止没有授权的用户访问HeroListComponent。
这并不是AppComponent的过错,并且无论该组件怎么改变都无法修复这个失败的测试程序。
A different battery of tests can explore whether the application navigates as expected in the presence of conditions that influence guards such as whether the user is authenticated and authorized.
不同的测试程序可以探索在不同条件下(比如像检查用户是否认证),该应用是否和期望的那样导航。
A future guide update will explain how to write such tests with the RouterTestingModule.
未来本章的更新将介绍如何使用RouterTestingModule来编写这样的测试程序。
"Shallow component tests" with NO_ERRORS_SCHEMA
使用NO_ERRORS_SCHEMA来“浅化”组件测试程序
The previous setup declared the BannerComponent and stubbed two other components
for no reason other than to avoid a compiler error.
以前的配置声明了BannerComponent,并stub伪造了两个其它组件,仅仅是为了避免编译错误,不是为别的原因。
Without them, the Angular compiler doesn't recognize the <app-banner>, <app-welcome> and <router-outlet> tags
in the app.component.html template and throws an error.
没有它们,Angular编译器无法识别app.component.html模板里的<app-banner>、<app-welcome>和<router-outlet>标签,并抛出错误。
Add NO_ERRORS_SCHEMA to the testing module's schemas metadata
to tell the compiler to ignore unrecognized elements and attributes.
You no longer have to declare irrelevant components and directives.
添加NO_ERRORS_SCHEMA到测试模块的schemas元数据中,告诉编译器忽略不认识的元素和属性。
这样你不再需要声明无关组件和指令。
These tests are shallow because they only "go deep" into the components you want to test.
Here is a setup, with import statements, that demonstrates the improved simplicity of shallow tests, relative to the stubbing setup.
这些测试程序比较浅,因为它们只“深入”到你要测试的组件。
这里是一套配置(拥有import语句),体现了相比使用stub伪造的配置来说,浅测试程序的简单性。
The only declarations are the component-under-test (AppComponent) and the RouterLinkStubDirective
that contributes actively to the tests.
The tests in this example are unchanged.
这里唯一声明的是被测试的组件(AppComponent)和测试需要的RouterLinkStubDirective。
没有改变任何原测试程序。
Shallow component tests with NO_ERRORS_SCHEMA greatly simplify unit testing of complex templates.
However, the compiler no longer alerts you to mistakes
such as misspelled or misused components and directives.
使用NO_ERRORS_SCHEMA的浅组件测试程序很大程度上简化了拥有复杂模板组件的单元测试。
但是,编译器将不再提醒你一些错误,比如模板中拼写错误或者误用的组件和指令。
Test an attribute directive
测试属性指令
An attribute directive modifies the behavior of an element, component or another directive. Its name reflects the way the directive is applied: as an attribute on a host element.
属性指令修改元素、组件和其它指令的行为。正如它们的名字所示,它们是作为宿主元素的属性来被使用的。
The sample application's HighlightDirective sets the background color of an element
based on either a data bound color or a default color (lightgray).
It also sets a custom property of the element (customProperty) to true
for no reason other than to show that it can.
本例子应用的HighlightDirective使用数据绑定的颜色或者默认颜色来设置元素的背景色。
它同时设置元素的customProperty属性为true,这里仅仅是为了显示它能这么做而已,并无其它原因。
src/app/shared/highlight.directive.ts
It's used throughout the application, perhaps most simply in the AboutComponent:
它的使用贯穿整个应用,也许最简单的使用在AboutComponent里:
src/app/about.component.ts
Testing the specific use of the HighlightDirective within the AboutComponent requires only the
techniques explored above (in particular the "Shallow test" approach).
使用AboutComponent来测试这个HightlightDirective的使用,只需要上面解释过的知识就够了,(尤其是"浅测试程序"方法)。
src/app/about.component.spec.ts
However, testing a single use case is unlikely to explore the full range of a directive's capabilities. Finding and testing all components that use the directive is tedious, brittle, and almost as unlikely to afford full coverage.
但是,测试单一的用例一般无法探索该指令的全部能力。 查找和测试所有使用该指令的组件非常繁琐和脆弱,并且通常无法覆盖所有组件。
Isolated unit tests might be helpful, but attribute directives like this one tend to manipulate the DOM. Isolated unit tests don't touch the DOMand, therefore , do not inspire confidence in the directive's efficacy.
孤立单元测试可能有用。 但是像这样的属性指令一般都操纵DOM。孤立单元测试不能控制DOM,所以不推荐用它测试指令的功能。
A better solution is to create an artificial test component that demonstrates all ways to apply the directive.
更好的方法是创建一个展示所有使用该组件的方法的人工测试组件。
src/app/shared/highlight.directive.spec.ts (TestComponent)
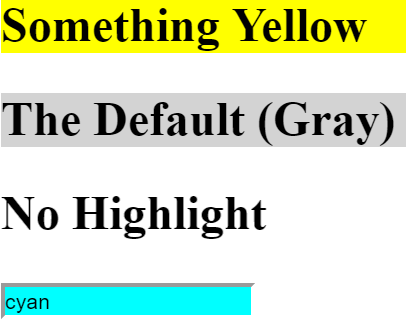
The <input> case binds the HighlightDirective to the name of a color value in the input box.
The initial value is the word "cyan" which should be the background color of the input box.
<input>用例将HighlightDirective绑定到输入框里输入的颜色名字。
初始只是单词“cyan”,所以输入框的背景色应该是cyan。
Here are some tests of this component:
下面是一些该组件的测试程序:
src/app/shared/highlight.directive.spec.ts (selected tests)
A few techniques are noteworthy:
一些技巧值得注意:
The
By.directivepredicate is a great way to get the elements that have this directive when their element types are unknown.当已知元素类型时,
By.directive是一种获取拥有这个指令的元素的好方法。The
:notpseudo-class inBy.css('h2:not([highlight])')helps find<h2>elements that do not have the directive.By.css('*:not([highlight])')finds any element that does not have the directive.By.css('h2:not([highlight])')里的:not伪类(pseudo-class)帮助查找不带该指令的<h2>元素。By.css('*:not([highlight])')查找所有不带该指令的元素。DebugElement.stylesaffords access to element styles even in the absence of a real browser, thanks to theDebugElementabstraction. But feel free to exploit thenativeElementwhen that seems easier or more clear than the abstraction.DebugElement.styles让我们不借助真实的浏览器也可以访问元素的样式,感谢DebugElement提供的这层抽象! 但是如果直接使用nativeElement会比这层抽象更简单、更清晰,也可以放心大胆的使用它。Angular adds a directive to the injector of the element to which it is applied. The test for the default color uses the injector of the second
<h2>to get itsHighlightDirectiveinstance and itsdefaultColor.Angular将指令添加到它的元素的注入器中。默认颜色的测试程序使用第二个
<h2>的注入器来获取它的HighlightDirective实例以及它的defaultColor。DebugElement.propertiesaffords access to the artificial custom property that is set by the directive.DebugElement.properties让我们可以访问由指令设置的自定义属性。
Isolated Unit Tests
孤立的单元测试
Testing applications with the help of the Angular testing utilities is the main focus of this guide.
使用Angular测试工具测试应用程序是本章的重点。
However, it's often more productive to explore the inner logic of application classes with isolated unit tests that don't depend upon Angular. Such tests are often smaller and easier to read, write, and maintain.
但是,使用孤立单元测试来探索应用类的内在逻辑往往更加有效率,它不依赖Angular。 这种测试程序通常比较小、更易阅读、编写和维护。
They don't carry extra baggage:
它们不用背负额外的包袱:
Import from the Angular test libraries.
从Angular测试库导入
Configure a module.
配置模块
Prepare dependency injection
providers.准备依赖注入
providersCall
injectorasyncorfakeAsync.调用
inject,或者async,或者fakeAsync
They follow patterns familiar to test developers everywhere:
它们会遵循测试时众所周知的模式:
Exhibit standard, Angular-agnostic testing techniques.
使用标准的、与Angular无关的测试技巧
Create instances directly with
new.直接使用
new创建实例Substitute test doubles (stubs, spys, and mocks) for the real dependencies.
用测试替身(stub,spy和mock)替代真正的依赖
Good developers write both kinds of tests for the same application part, often in the same spec file. Write simple isolated unit tests to validate the part in isolation. Write Angular tests to validate the part as it interacts with Angular, updates the DOM, and collaborates with the rest of the application.
优秀的开发者同时编写这两种测试程序来测试相同的应用部件,往往在同一个spec文件。 编写简单的孤立单元测试程序来验证孤立的部分。 编写Angular测试程序来验证与Angular互动、更新DOM、以及与应用其它部分互动的部分。
Services
服务
Services are good candidates for isolated unit testing.
Here are some synchronous and asynchronous unit tests of the FancyService
written without assistance from Angular testing utilities.
服务是应用孤立测试的好例子。
下面是未使用Angular测试工具的一些FancyService的同步和异步单元测试:
src/app/bag/bag.no-testbed.spec.ts
A rough line count suggests that these isolated unit tests are about 25% smaller than equivalent Angular tests. That's telling but not decisive. The benefit comes from reduced setup and code complexity.
粗略行数表明,这些孤立单元测试比同等的Angular测试小25%。 这表明了它的好处,但是不是最关键的。 主要的好处来自于缩减的配置和代码的复杂性。
Compare these equivalent tests of FancyService.getTimeoutValue.
比较下面两个同等的FancyService.getTimeoutValue测试程序:
They have about the same line-count, but the Angular-dependent version
has more moving parts including a couple of utility functions (async and inject).
Both approaches work and it's not much of an issue if you're using the
Angular testing utilities nearby for other reasons.
On the other hand, why burden simple service tests with added complexity?
它们有类似的行数。
但是,依赖Angular的版本有更多活动的部分,包括一些工具函数(async和inject)。
两种方法都可行,而且如果你为了某些原因使用Angular测试工具,也并没有什么问题。
反过来,为什么要为简单的服务测试程序添加复杂度呢?
Pick the approach that suits you.
选择你喜欢的方法。
Services with dependencies
带依赖的服务
Services often depend on other services that Angular injects into the constructor.
You can test these services without the TestBed.
In many cases, it's easier to create and inject dependencies by hand.
服务通常依赖其它服务,Angular通过构造函数注入它们。 你可以不使用TestBed测试这些服务。 在许多情况下,创建和手动注入依赖来的更加容易。
The DependentService is a simple example:
DependentService是一个简单的例子:
src/app/bag/bag.ts
It delegates its only method, getValue, to the injected FancyService.
它将唯一的方法,getValue,委托给了注入的FancyService。
Here are several ways to test it.
这里是几种测试它的方法。
src/app/bag/bag.no-testbed.spec.ts
The first test creates a FancyService with new and passes it to the DependentService constructor.
第一个测试程序使用new创建FancyService实例,并将它传递给DependentService构造函数。
However, it's rarely that simple. The injected service can be difficult to create or control. You can mock the dependency, use a dummy value, or stub the pertinent service method with a substitute method that 's easy to control.
很少有这么简单的,注入的服务有可能很难创建和控制。 你可以mock依赖,或者使用假值,或者用易于控制的替代品stub伪造相关服务。
These isolated unit testing techniques are great for exploring the inner logic of a service or its simple integration with a component class. Use the Angular testing utilities when writing tests that validate how a service interacts with components within the Angular runtime environment.
这些孤立单元测试技巧是一个很好的方法,用来探索服务的内在逻辑,以及它与组件类简单的集成。 当在运行时间环境下,使用Angular测试工具来验证一个服务是如何与组件互动的。
Pipes
管道
Pipes are easy to test without the Angular testing utilities.
管道很容易测试,无需Angular测试工具。
A pipe class has one method, transform, that manipulates the input
value into a transformed output value.
The transform implementation rarely interacts with the DOM.
Most pipes have no dependence on Angular other than the @Pipe
metadata and an interface.
管道类有一个方法,transform,用来转换输入值到输出值。
transform的实现很少与DOM交互。
除了@Pipe元数据和一个接口外,大部分管道不依赖Angular。
Consider a TitleCasePipe that capitalizes the first letter of each word.
Here's a naive implementation with a regular expression.
假设TitleCasePipe将每个单词的第一个字母变成大写。
下面是使用正则表达式实现的简单代码:
src/app/shared/title-case.pipe.ts
Anything that uses a regular expression is worth testing thoroughly. Use simple Jasmine to explore the expected cases and the edge cases.
任何使用正则表达式的类都值得彻底的进行测试。 使用Jasmine来探索预期的用例和极端的用例。
src/app/shared/title-case.pipe.spec.ts
Write Angular tests too
同时也编写Angular测试
These are tests of the pipe in isolation.
They can't tell if the TitleCasePipe is working properly as applied in the application components.
有些管道的测试程序是孤立的。
它们不能验证TitleCasePipe是否在应用到组件上时是否工作正常。
Consider adding component tests such as this one:
考虑像这样添加组件测试程序:
src/app/hero/hero-detail.component.spec.ts (pipe test)
Components
组件
Component tests typically examine how a component class interacts with its own template or with collaborating components. The Angular testing utilities are specifically designed to facilitate such tests.
组件测试通常检查该组件类是如何与自己的模板或者其它合作组件交互的。 Angular测试工具是专门为这种测试设计的。
Consider this ButtonComp component.
考虑这个ButtonComp组件。
src/app/bag/bag.ts (ButtonComp)
The following Angular test demonstrates that clicking a button in the template leads to an update of the on-screen message.
下面的Angular测试演示点击模板里的按钮后,引起了屏幕上的消息的更新。
src/app/bag/bag.spec.ts (ButtonComp)
The assertions verify that the data values flow from one HTML control (the <button>) to the component and
from the component back to a different HTML control (the <span>).
A passing test means the component and its template are wired correctly.
该判断验证了数据绑定从一个HTML控件(<button>)流动到组件,以及从组件回到不同的HTML控件(<span>)。
通过的测试程序说明组件和它的模块是否设置正确。
Isolated unit tests can more rapidly probe a component at its API boundary, exploring many more conditions with less effort.
孤立单元测试可以更快的在API边界探测组件,更轻松的探索更多条件。
Here are a set of unit tests that verify the component's outputs in the face of a variety of component inputs.
下面是一套单元测试程序,用来验证面对多种输入时组件的输出。
src/app/bag/bag.no-testbed.spec.ts (ButtonComp)
Isolated component tests offer a lot of test coverage with less code and almost no setup. This is even more of an advantage with complex components, which may require meticulous preparation with the Angular testing utilities.
孤立组件单元测试使用更少的代码以及几乎不存在的配置,提供了很多测试覆盖率。 在测试复杂的组件时,这个优势显得更加明显,因为可能需要使用Angular测试工具进行精心准备。
On the other hand, isolated unit tests can't confirm that the ButtonComp is
properly bound to its template or even data bound at all.
Use Angular tests for that.
但是,孤立测试无法确认ButtonComp是否与其模板正确的绑定,或者是否有数据绑定。
使用Angular测试来应对它们。
Angular testing utility APIs
Angular测试工具API
This section takes inventory of the most useful Angular testing features and summarizes what they do.
本节将最有用的Angular测试功能提取出来,并总结了它们的作用。
The Angular testing utilities include the TestBed, the ComponentFixture, and a handful of functions that control the test environment.
The TestBed and ComponentFixture classes are covered separately.
Angular测试工具包括TestBed、ComponentFixture和一些其他函数,用来控制测试环境。
TestBed和ComponentFixture在这里分别解释了。
Here's a summary of the stand-alone functions, in order of likely utility:
下面是一些独立函数的总结,以使用频率排序:
Function 函数 | Description 描述 |
|---|---|
async | Runs the body of a test ( 在特殊的async测试区域运行测试程序( |
fakeAsync | Runs the body of a test ( 在特殊的fakeAsync测试区域运行测试程序( |
tick | Simulates the passage of time and the completion of pending asynchronous activities by flushing both timer and micro-task queues within the fakeAsync test zone. 在fakeAsync测试区域内触发计时器和微任务队列,以模拟时间的推移和未完成异步任务的完成。 The curious, dedicated reader might enjoy this lengthy blog post, "Tasks, microtasks, queues and schedules". 好奇和执着的读者可能会喜欢这篇长博客: "Tasks, microtasks, queues and schedules". Accepts an optional argument that moves the virtual clock forward by the specified number of milliseconds, clearing asynchronous activities scheduled within that timeframe. See discussion above. 接受一个可选参数,往前推移虚拟时间提供数字的毫秒数,清除在这段时间内的异步行为。 参见上面的讨论 |
inject | Injects one or more services from the current 从当前 |
discardPeriodicTasks | When a 当 In general, a test should end with no queued tasks.
When pending timer tasks are expected, call 一般来讲,测试程序应该以无排队任务结束。
当待执行计时器任务存在时,调用 |
flushMicrotasks | When a 当 In general, a test should wait for micro-tasks to finish.
When pending microtasks are expected, call 一般来说,测试应该等待微任务结束。
当待执行微任务存在时,调用 |
ComponentFixtureAutoDetect | A provider token for a service that turns on automatic change detection. 一个提供商令牌,用来设置auto-changeDetect的值,它默认值为 |
getTestBed | Gets the current instance of the 获取当前 |
TestBed class summary
TestBed 类总结
The TestBed class is one of the principal Angular testing utilities.
Its API is quite large and can be overwhelming until you've explored it,
a little at a time. Read the early part of this guide first
to get the basics before trying to absorb the full API.
TestBed类是Angular测试工具的主要类之一。它的API很庞大,可能有点过于复杂,直到你一点一点的探索它们。
阅读本章前面的部分,了解了基本的知识以后,再试着了解完整API。
The module definition passed to configureTestingModule
is a subset of the @NgModule metadata properties.
传递给configureTestingModule的模块定义是@NgModule元数据属性的子集。
Each override method takes a MetadataOverride<T> where T is the kind of metadata
appropriate to the method, that is, the parameter of an @NgModule,
@Component, @Directive, or @Pipe.
每一个重载方法接受一个MetadataOverride<T>,这里T是适合这个方法的元数据类型,也就是@NgModule、@Component、@Directive或者@Pipe的参数。
The TestBed API consists of static class methods that either update or reference a global instance of theTestBed.
TestBed的API包含了一系列静态类方法,它们更新或者引用全局的TestBed实例。
Internally, all static methods cover methods of the current runtime TestBed instance ,
which is also returned by the getTestBed() function.
在内部,所有静态方法在getTestBed()函数返回的当前运行时间的TestBed实例上都有对应的方法。
Call TestBed methods within a beforeEach() to ensure a fresh start before each individual test.
在BeforeEach()内调用TestBed方法,这样确保在运行每个单独测试时,都有崭新的开始。
Here are the most important static methods, in order of likely utility.
这里列出了最重要的静态方法,以使用频率排序:
Methods 方法 | Description 描述 |
|---|---|
configureTestingModule | The testing shims ( 测试垫片( Call 调用 |
compileComponents | Compile the testing module asynchronously after you've finished configuring it.
You must call this method if any of the testing module components have a 在你完成配置以后异步编译测试模块。
如果任何测试组件有 After calling 调用完 |
createComponent | Create an instance of a component of type 基于当前 |
overrideModule | Replace metadata for the given 替换指定的 |
overrideComponent | Replace metadata for the given component class, which could be nested deeply within an inner module. 替换指定组件类的元数据,该组件类可能嵌套在一个很深的内部模块中。 |
overrideDirective | Replace metadata for the given directive class, which could be nested deeply within an inner module. 替换指定指令类的元数据,该指令可能嵌套在一个很深的内部模块中。 |
overridePipe | Replace metadata for the given pipe class, which could be nested deeply within an inner module. 替换指定管道类的元数据,该管道可能嵌套在一个很深的内部模块中。 |
get | Retrieve a service from the current 从当前 The
The
After calling 一旦调用, |
initTestEnvironment | Initialize the testing environment for the entire test run. 为整套测试的运行初始化测试环境。 The testing shims ( 测试垫片( You may call this method exactly once. If you must change
this default in the middle of your test run, call 这个方法只能被调用一次。如果确实需要在测试程序运行期间变换这个默认设置,那么先调用 Specify the Angular compiler factory, a 指定Angular编译器工厂, |
resetTestEnvironment | Reset the initial test environment, including the default testing module. 重设初始测试环境,包括默认测试模块在内。 |
A few of the TestBed instance methods are not covered by static TestBed class methods.
These are rarely needed.
少数TestBed实例方法没有对应的静态方法。它们很少被使用。
The ComponentFixture
ComponentFixture对象
The TestBed.createComponent<T>
creates an instance of the component T
and returns a strongly typed ComponentFixture for that component.
TestBed.createComponent<T>创建一个组件T的实例,并为该组件返回一个强类型的ComponentFixture。
The ComponentFixture properties and methods provide access to the component,
its DOM representation, and aspects of its Angular environment.
ComponentFixture的属性和方法提供了对组件、它的DOM和它的Angular环境方面的访问。
ComponentFixture properties
ComponentFixture的属性
Here are the most important properties for testers, in order of likely utility.
下面是对测试最重要的属性,以使用频率排序:
Properties 属性 | Description 描述 |
|---|---|
componentInstance | The instance of the component class created by 被 |
debugElement | The 与组件根元素关联的 The
|
nativeElement | The native DOM element at the root of the component. 组件的原生根DOM元素。 |
changeDetectorRef | The 组件的 The 在测试一个拥有 |
ComponentFixture methods
ComponentFixture的方法
The fixture methods cause Angular to perform certain tasks on the component tree. Call these method to trigger Angular behavior in response to simulated user action.
fixture方法使Angular对组件树执行某些任务。 在触发Angular行为来模拟的用户行为时,调用这些方法。
Here are the most useful methods for testers.
下面是对测试最有用的方法。
Methods 方法 | Description 描述 |
|---|---|
detectChanges | Trigger a change detection cycle for the component. 为组件触发一轮变化检查。 Call it to initialize the component (it calls 调用它来初始化组件(它调用 Runs 之后,运行 |
autoDetectChanges | Set this to 设置fixture是否应该自动试图检测变化。 When autodetect is 当自动检测打开时,测试fixture监听zone事件,并调用 The default is 默认值是 |
checkNoChanges | Do a change detection run to make sure there are no pending changes. Throws an exceptions if there are. 运行一次变更检测来确认没有待处理的变化。如果有未处理的变化,它将抛出一个错误。 |
isStable | If the fixture is currently stable, returns 如果fixture当前是稳定的,则返回 |
whenStable | Returns a promise that resolves when the fixture is stable. 返回一个承诺,在fixture稳定时解析。 To resume testing after completion of asynchronous activity or asynchronous change detection, hook that promise. See above. 钩住这个承诺,以在异步行为或者异步变更检测之后继续测试。参见上面。 |
destroy | Trigger component destruction. 触发组件的销毁。 |
DebugElement
The DebugElement provides crucial insights into the component's DOM representation.
DebugElement提供了对组件的DOM的访问。
From the test root component's DebugElement returned by fixture.debugElement,
you can walk (and query) the fixture's entire element and component subtrees.
fixture.debugElement返回测试根组件的DebugElement,通过它你可以访问(查询)fixture的整个元素和组件子树。
Here are the most useful DebugElement members for testers, in approximate order of utility:
下面是DebugElement最有用的成员,以使用频率排序。
Member 成员 | Description 描述 |
|---|---|
nativeElement | The corresponding DOM element in the browser (null for WebWorkers). 与浏览器中DOM元素对应(WebWorkers时,值为null)。 |
query | Calling 调用 |
queryAll | Calling 调用 |
injector | The host dependency injector. For example, the root element's component instance injector. 宿主依赖注入器。 比如,根元素的组件实例注入器。 |
componentInstance | The element's own component instance, if it has one. 元素自己的组件实例(如果有)。 |
context | An object that provides parent context for this element. Often an ancestor component instance that governs this element. 为元素提供父级上下文的对象。 通常是控制该元素的祖级组件实例。 When an element is repeated within 当一个元素被 |
children | The immediate
|
parent | The
|
name | The element tag name, if it is an element. 元素的标签名字,如果它是一个元素的话。 |
triggerEventHandler | Triggers the event by its name if there is a corresponding listener
in the element's 如果在元素的 If the event lacks a listener or there's some other problem,
consider calling 如果事件缺乏监听器,或者有其它问题,考虑调用 |
listeners | The callbacks attached to the component's 元素的 |
providerTokens | This component's injector lookup tokens.
Includes the component itself plus the tokens that the component lists in its 组件注入器的查询令牌。
包括组件自己的令牌和组件的 |
source | Where to find this element in the source component template. source是在源组件模板中查询这个元素的处所。 |
references | Dictionary of objects associated with template local variables (e.g. 与模板本地变量(比如 |
The DebugElement.query(predicate) and DebugElement.queryAll(predicate) methods take a
predicate that filters the source element's subtree for matching DebugElement.
DebugElement.query(predicate)和DebugElement.queryAll(predicate)方法接受一个条件方法,
它过滤源元素的子树,返回匹配的DebugElement。
The predicate is any method that takes a DebugElement and returns a truthy value.
The following example finds all DebugElements with a reference to a template local variable named "content":
这个条件方法是任何接受一个DebugElement并返回真值的方法。
下面的例子查询所有拥有名为content的模块本地变量的所有DebugElement:
The Angular By class has three static methods for common predicates:
Angular的By类为常用条件方法提供了三个静态方法:
By.all- return all elements.By.all- 返回所有元素By.css(selector)- return elements with matching CSS selectors.By.css(selector)- 返回符合CSS选择器的元素。By.directive(directive)- return elements that Angular matched to an instance of the directive class.By.directive(directive)- 返回Angular能匹配一个指令类实例的所有元素。
src/app/hero/hero-list.component.spec.ts
Here's an example of Renderer tests from the
下面是Renderer测试程序的例子
Test environment setup files
测试环境的设置文件
Unit testing requires some configuration and bootstrapping that is captured in setup files. The setup files for this guide are provided for you when you follow the Setup instructions. The CLI delivers similar files with the same purpose.
单元测试需要一些配置和启动代码,它们被收集到了这些设置文件中。 当你遵循环境设置中的步骤操作时,就会得到这些设置文件。 CLI工具也会生成类似的文件。
Here's a brief description of this guide's setup files:
下面是对本章中这些设置文件的简短说明:
The deep details of these files and how to reconfigure them for your needs is a topic beyond the scope of this guide .
本章不会深入讲解这些文件的详情以及如何根据需要重新配置它们,那超出了本章的范围。
| File 文件 | Description 描述 |
|---|---|
karma.conf.js | The karma configuration file that specifies which plug-ins to use, which application and test files to load, which browser(s) to use, and how to report test results. 这个karma配置文件指定了要使用那些插件、要加载那些应用文件和测试文件、要使用哪些浏览器以及如何报告测试结果。 It loads three other setup files: 它加载了下列设置文件:
|
karma-test-shim.js | This shim prepares karma specifically for the Angular test environment
and launches karma itself.
It loads the 这个垫片(shim)文件为karma准备Angular特有的测试环境,并启动karma自身。
这期间,它还加载 |
systemjs.config.js | SystemJS
loads the application and test files.
This script tells SystemJS where to find those files and how to load them.
It's the same version of SystemJS加载应用文件和测试文件。
这个脚本告诉SystemJS到哪里去找那些文件,以及如何加载它们。
它和你在环境设置期间安装的那个 |
systemjs.config.extras.js | An optional file that supplements the SystemJS configuration in 一个可选的文件,它会为 A stock 常规的 The sample version for this guide adds the model barrel
to the SystemJs 本章的例子中把*模型桶(barrel)添加到了SystemJS的 |
systemjs.config.extras.js | |
npm packages
npm包
The sample tests are written to run in Jasmine and karma.
The two "fast path" setups added the appropriate Jasmine and karma npm packages to the
devDependencies section of the package.json.
They're installed when you run npm install.
这些范例测试是为在Jasmine和karma而写的。
那两条“捷径”设置会把适当的Jasmine和Karma包添加到package.json的devDependencies区。
当我们运行npm install时,它们就会被安装上。
FAQ: Frequently Asked Questions
常见问题
Why put specs next to the things they test?
为何将测试的spec配置文件放置到被测试文件的傍边?
It's a good idea to put unit test spec files in the same folder as the application source code files that they test:
我们推荐将单元测试的spec配置文件放到与应用程序源代码文件所在的同一个文件夹中,因为:
Such tests are easy to find.
这样的测试程序很容易被找到
You see at a glance if a part of your application lacks tests.
你可以一眼看出应用程序的那些部分缺乏测试程序。
Nearby tests can reveal how a part works in context.
临近的测试程序可以展示代码是如何在上下文中工作的
When you move the source (inevitable), you remember to move the test.
当你移动代码(无可避免)时,你记得一起移动测试程序
When you rename the source file (inevitable), you remember to rename the test file.
当你重命名源代码文件(无可避免),你记得重命名测试程序文件。
When would I put specs in a test folder?
什么时候我应该把测试spec文件放到测试目录中?
Application integration specs can test the interactions of multiple parts spread across folders and modules. They don't really belong to any part in particular, so they don't have a natural home next to any one file.
应用程序的整合测试spec文件可以测试横跨多个目录和模块的多个部分之间的互动。 它们不属于任何部分,很自然,没有特别的地方存放它们。
It's often better to create an appropriate folder for them in the tests directory.
通常,在test目录中为它们创建一个合适的目录比较好。
Of course specs that test the test helpers belong in the test folder,
next to their corresponding helper files.
当然,测试助手对象的测试spec文件也属于test目录,与它们对应的助手文件相邻。