This cookbook contains recipes for common component communication scenarios
in which two or more components share information.
本烹饪宝典包含了常见的组件通讯场景,也就是让两个或多个组件之间共享信息的方法。
For an in-depth look at each fundamental concepts in component communication, we can find detailed description and
samples in the Component Communication document.
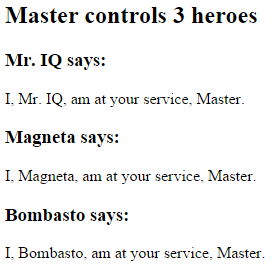
The HeroParentComponent nests the child HeroChildComponent inside an *ngFor repeater,
binding its master string property to the child's master alias, and each iteration's hero instance to the child's hero property.
E2E test that all children were instantiated and displayed as expected:
端到端测试,用于确保所有的子组件都像所期待的那样被初始化并显示出来。
// ...
let _heroNames = ['Mr. IQ', 'Magneta', 'Bombasto'];
let _masterName = 'Master';
it('should pass properties to children properly', function () {
let parent = element.all(by.tagName('hero-parent')).get(0);
let heroes = parent.all(by.tagName('hero-child'));
for (let i = 0; i < _heroNames.length; i++) {
let childTitle = heroes.get(i).element(by.tagName('h3')).getText();
let childDetail = heroes.get(i).element(by.tagName('p')).getText();
expect(childTitle).toEqual(_heroNames[i] + ' says:');
expect(childDetail).toContain(_masterName);
}
});
// ...
import { Component, Input } from '@angular/core';
@Component({
selector: 'name-child',
template: '<h3>"{{name}}"</h3>'
})
export class NameChildComponent {
private _name = '';
@Input()
set name(name: string) {
this._name = (name && name.trim()) || '<no name set>';
}
get name(): string { return this._name; }
}
Here's the NameParentComponent demonstrating name variations including a name with all spaces:
下面的NameParentComponent展示了各种名字的处理方式,包括一个全是空格的名字。
import { Component } from '@angular/core';
@Component({
selector: 'name-parent',
template: `
<h2>Master controls {{names.length}} names</h2>
<name-child *ngFor="let name of names" [name]="name"></name-child>
`
})
export class NameParentComponent {
// Displays 'Mr. IQ', '<no name set>', 'Bombasto'
names = ['Mr. IQ', ' ', ' Bombasto '];
}
Test it
测试
E2E tests of input property setter with empty and non-empty names:
端到端测试:输入属性的setter,分别使用空名字和非空名字。
// ...
it('should display trimmed, non-empty names', function () {
let _nonEmptyNameIndex = 0;
let _nonEmptyName = '"Mr. IQ"';
let parent = element.all(by.tagName('name-parent')).get(0);
let hero = parent.all(by.tagName('name-child')).get(_nonEmptyNameIndex);
let displayName = hero.element(by.tagName('h3')).getText();
expect(displayName).toEqual(_nonEmptyName);
});
it('should replace empty name with default name', function () {
let _emptyNameIndex = 1;
let _defaultName = '"<no name set>"';
let parent = element.all(by.tagName('name-parent')).get(0);
let hero = parent.all(by.tagName('name-child')).get(_emptyNameIndex);
let displayName = hero.element(by.tagName('h3')).getText();
expect(displayName).toEqual(_defaultName);
});
// ...
// ...
// Test must all execute in this exact order
it('should set expected initial values', function () {
let actual = getActual();
let initialLabel = 'Version 1.23';
let initialLog = 'Initial value of major set to 1, Initial value of minor set to 23';
expect(actual.label).toBe(initialLabel);
expect(actual.count).toBe(1);
expect(actual.logs.get(0).getText()).toBe(initialLog);
});
it('should set expected values after clicking \'Minor\' twice', function () {
let repoTag = element(by.tagName('version-parent'));
let newMinorButton = repoTag.all(by.tagName('button')).get(0);
newMinorButton.click().then(function() {
newMinorButton.click().then(function() {
let actual = getActual();
let labelAfter2Minor = 'Version 1.25';
let logAfter2Minor = 'minor changed from 24 to 25';
expect(actual.label).toBe(labelAfter2Minor);
expect(actual.count).toBe(3);
expect(actual.logs.get(2).getText()).toBe(logAfter2Minor);
});
});
});
it('should set expected values after clicking \'Major\' once', function () {
let repoTag = element(by.tagName('version-parent'));
let newMajorButton = repoTag.all(by.tagName('button')).get(1);
newMajorButton.click().then(function() {
let actual = getActual();
let labelAfterMajor = 'Version 2.0';
let logAfterMajor = 'major changed from 1 to 2, minor changed from 25 to 0';
expect(actual.label).toBe(labelAfterMajor);
expect(actual.count).toBe(4);
expect(actual.logs.get(3).getText()).toBe(logAfterMajor);
});
});
function getActual() {
let versionTag = element(by.tagName('version-child'));
let label = versionTag.element(by.tagName('h3')).getText();
let ul = versionTag.element((by.tagName('ul')));
let logs = ul.all(by.tagName('li'));
return {
label: label,
logs: logs,
count: logs.count()
};
}
// ...
The child component exposes an EventEmitter property with which it emitsevents when something happens.
The parent binds to that event property and reacts to those events.
A parent component cannot use data binding to read child properties
or invoke child methods. You can do both
by creating a template reference variable for the child element
and then reference that variable within the parent template
as seen in the following example.
The following is a child CountdownTimerComponent that repeatedly counts down to zero and launches a rocket. It has start and stop methods that control the clock and it displays a countdown status message in its own template.
The CountdownLocalVarParentComponent that hosts the timer componentis as follows:
让我们来看看计时器组件的宿主组件CountdownLocalVarParentComponent。
import { Component } from '@angular/core';
import { CountdownTimerComponent } from './countdown-timer.component';
@Component({
selector: 'countdown-parent-lv',
template: `
<h3>Countdown to Liftoff (via local variable)</h3>
<button (click)="timer.start()">Start</button>
<button (click)="timer.stop()">Stop</button>
<div class="seconds">{{timer.seconds}}</div>
<countdown-timer #timer></countdown-timer>
`,
styleUrls: ['demo.css']
})
export class CountdownLocalVarParentComponent { }
The parent component cannot data bind to the child's
start and stop methods nor to its seconds property.
父组件不能通过数据绑定使用子组件的start和stop方法,也不能访问子组件的seconds属性。
You can place a local variable, #timer, on the tag <countdown-timer> representing the child component.
That gives you a reference to the child component and the ability to access
any of its properties or methods from within the parent template.
Here we see the parent and child working together.
下面是父组件和子组件一起工作时的效果。
Test it
测试
Test that the seconds displayed in the parent template
match the seconds displayed in the child's status message.
Test also that clicking the Stop button pauses the countdown timer:
测试确保在父组件模板中显示的秒数和子组件状态信息里的秒数同步。它还会点击Stop按钮来停止倒计时:
// ...
it('timer and parent seconds should match', function () {
let parent = element(by.tagName(parentTag));
let message = parent.element(by.tagName('countdown-timer')).getText();
browser.sleep(10); // give `seconds` a chance to catchup with `message`
let seconds = parent.element(by.className('seconds')).getText();
expect(message).toContain(seconds);
});
it('should stop the countdown', function () {
let parent = element(by.tagName(parentTag));
let stopButton = parent.all(by.tagName('button')).get(1);
stopButton.click().then(function() {
let message = parent.element(by.tagName('countdown-timer')).getText();
expect(message).toContain('Holding');
});
});
// ...
The local variable approach is simple and easy. But it is limited because
the parent-child wiring must be done entirely within the parent template.
The parent component itself has no access to the child.
You can't use the local variable technique if an instance of the parent component class
must read or write child component values or must call child component methods.
如果父组件的类需要读取子组件的属性值或调用子组件的方法,就不能使用本地变量方法。
When the parent component class requires that kind of access,
inject the child component into the parent as a ViewChild.
当父组件类需要这种访问时,可以把子组件作为ViewChild,注入到父组件里面。
The following example illustrates this technique with the same
Countdown Timer example.
Neither its appearance nor its behavior will change.
The child CountdownTimerComponent is the same as well.
The #timer local variable is gone from the component metadata.
Instead , bind the buttons to the parent component's own start and stop methods and
present the ticking seconds in an interpolation around the parent component's seconds method.
These methods access the injected timer component directly.
这些方法可以直接访问被注入的计时器组件。
The ngAfterViewInit() lifecycle hook is an important wrinkle.
The timer component isn't available until after Angular displays the parent view.
So it displays 0 seconds initially.
Then Angular calls the ngAfterViewInit lifecycle hook at which time it is too late
to update the parent view's display of the countdown seconds.
Angular's unidirectional data flow rule prevents updating the parent view's
in the same cycle. The app has to wait one turn before it can display the seconds.
A parent component and its children share a service whose interface enables bi-directional communication within the family.
父组件和它的子组件共享同一个服务,利用该服务在家庭内部实现双向通讯。
The scope of the service instance is the parent component and its children.
Components outside this component subtree have no access to the service or their communications.
import { Injectable } from '@angular/core';
import { Subject } from 'rxjs/Subject';
@Injectable()
export class MissionService {
// Observable string sources
private missionAnnouncedSource = new Subject<string>();
private missionConfirmedSource = new Subject<string>();
// Observable string streams
missionAnnounced$ = this.missionAnnouncedSource.asObservable();
missionConfirmed$ = this.missionConfirmedSource.asObservable();
// Service message commands
announceMission(mission: string) {
this.missionAnnouncedSource.next(mission);
}
confirmMission(astronaut: string) {
this.missionConfirmedSource.next(astronaut);
}
}
The MissionControlComponent both provides the instance of the service that it shares with its children
(through the providers metadata array) and injects that instance into itself through its constructor:
import { Component } from '@angular/core';
import { MissionService } from './mission.service';
@Component({
selector: 'mission-control',
template: `
<h2>Mission Control</h2>
<button (click)="announce()">Announce mission</button>
<my-astronaut *ngFor="let astronaut of astronauts"
[astronaut]="astronaut">
</my-astronaut>
<h3>History</h3>
<ul>
<li *ngFor="let event of history">{{event}}</li>
</ul>
`,
providers: [MissionService]
})
export class MissionControlComponent {
astronauts = ['Lovell', 'Swigert', 'Haise'];
history: string[] = [];
missions = ['Fly to the moon!',
'Fly to mars!',
'Fly to Vegas!'];
nextMission = 0;
constructor(private missionService: MissionService) {
missionService.missionConfirmed$.subscribe(
astronaut => {
this.history.push(`${astronaut} confirmed the mission`);
});
}
announce() {
let mission = this.missions[this.nextMission++];
this.missionService.announceMission(mission);
this.history.push(`Mission "${mission}" announced`);
if (this.nextMission >= this.missions.length) { this.nextMission = 0; }
}
}
The AstronautComponent also injects the service in its constructor.
Each AstronautComponent is a child of the MissionControlComponent and therefore receives its parent's service instance:
Notice that this example captures the subscription and unsubscribe() when the AstronautComponent is destroyed.
This is a memory-leak guard step. There is no actual risk in this app because the
lifetime of a AstronautComponent is the same as the lifetime of the app itself.
That would not always be true in a more complex application.
The History log demonstrates that messages travel in both directions between
the parent MissionControlComponent and the AstronautComponent children,
facilitated by the service:
// ...
it('should announce a mission', function () {
let missionControl = element(by.tagName('mission-control'));
let announceButton = missionControl.all(by.tagName('button')).get(0);
announceButton.click().then(function () {
let history = missionControl.all(by.tagName('li'));
expect(history.count()).toBe(1);
expect(history.get(0).getText()).toMatch(/Mission.* announced/);
});
});
it('should confirm the mission by Lovell', function () {
testConfirmMission(1, 2, 'Lovell');
});
it('should confirm the mission by Haise', function () {
testConfirmMission(3, 3, 'Haise');
});
it('should confirm the mission by Swigert', function () {
testConfirmMission(2, 4, 'Swigert');
});
function testConfirmMission(buttonIndex: number, expectedLogCount: number, astronaut: string) {
let _confirmedLog = ' confirmed the mission';
let missionControl = element(by.tagName('mission-control'));
let confirmButton = missionControl.all(by.tagName('button')).get(buttonIndex);
confirmButton.click().then(function () {
let history = missionControl.all(by.tagName('li'));
expect(history.count()).toBe(expectedLogCount);
expect(history.get(expectedLogCount - 1).getText()).toBe(astronaut + _confirmedLog);
});
}
// ...